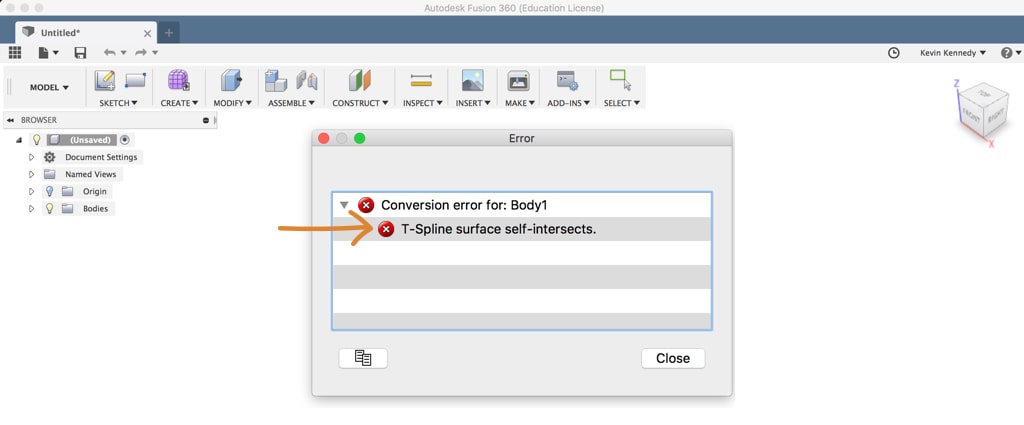
Whether you’ve imported a t-spline model from another program, or you’re trying to convert your sculpted form into a solid body, getting the “self-intersecting t-spline error” can be super frustrating.
The first thing you should understand is what the error means and why it happens. When the error message comes up in the lower right-hand corner, you’ll see that it highlights the problem area of your model in red.
This specific t-spline error is pretty self-explanatory. It’s caused by faces that intersectProjects the points, model edges, work geometries, and sketch curves that intersect the active sketch plane. Use the selection filter to project a specific type of geometry or the entire model. More with other faces. Put simply, Fusion 360 won’t allow this to happen because two things can’t really exist in the same exact space.
To fix this error, we’ll take a look atRe-arranges screen to look at selected object. More some common solutions to get rid of the intersecting geometry.
1. Take Note of All the Errors
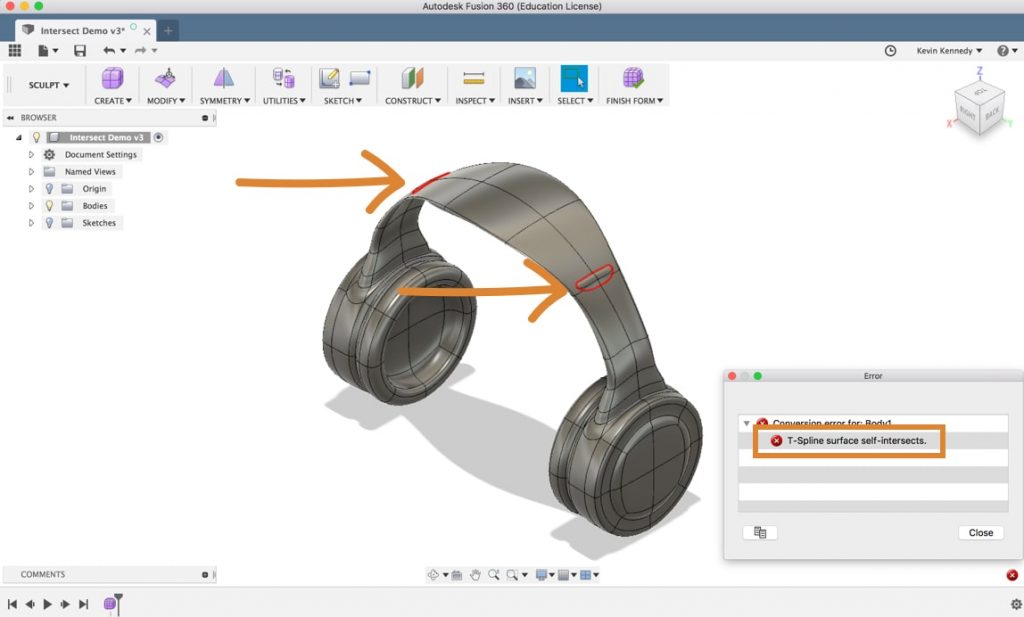
First, hit the “finish form” button in the Fusion 360 toolbarUse the Toolbar to select the workspace you want to work in, and the tool you want to use in the workspace selected. More. Then, take note of the errors on your model. They’ll all be highlighted in red. Depending on your model and error, you may end up having more than one spot that needs to be fixed and that’s okay. I recommend tackling each error one by one unless your model is symmetric. If your model is symmetrical then you can turn on symmetry to fix multiple errors at once (more on this later).
If we take a look at this headphone model that I sculpted, you’ll see that I have the self-intersecting error on both sides of the headband. It looks like I pushed or pulled too far, causing the edge or face of the padded area to collide with the faces of the headband.
2. Checking for Errors with Repair Body
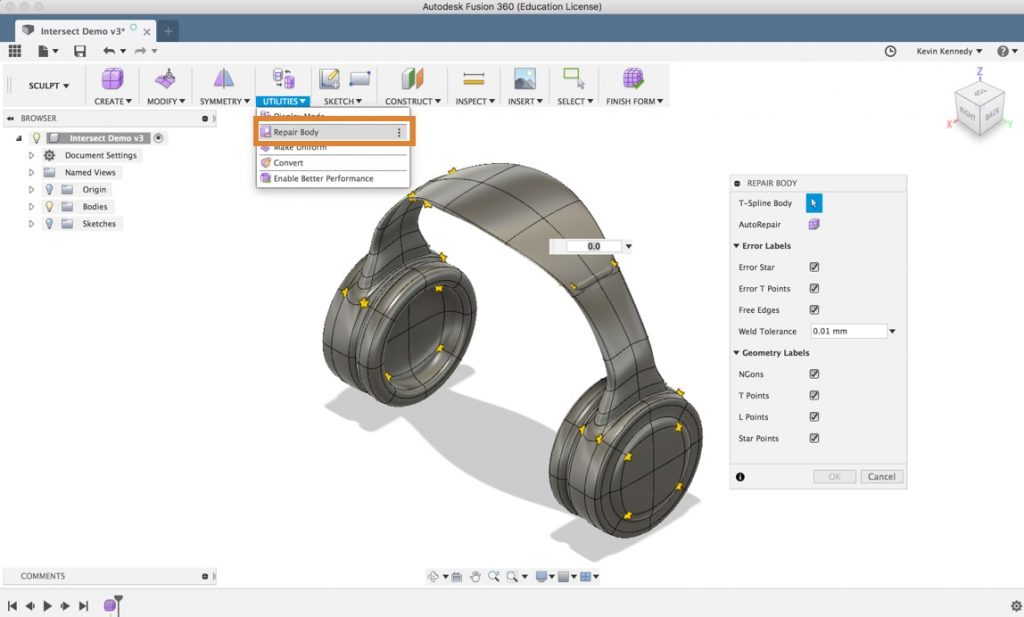
After you take note of where your errors are located you should check the “Repair Body” command. The repair body command may not be able to fix your self-intersecting errors, but at the very least it will let you know if your t-spline model has any t-point or star-point errors.
SelectThe selection mode controls how objects are select when you drag in the canvas. More “Repair Body” from the “Utilities” dropdown list. Then, you’ll first have to select the t-spline body as depicted in the dialog boxCreates a solid box. Select a plane, draw a rectangle then specify the height of the box. More. After you select the t-spline body you’re given the option to toggle on and off the different error labels to check.
If you click “Repair Body” and it doesn’t do anything…that’s great! That means it’s not detecting any t-point or star-point errors. If it does detect some errors, you’ll typically see the color of your stars change from red to yellow.
To briefly explain the star-point errors. A star-point is any pointCreates a sketch point. More that has 3, 5, or more faces all converging at a single point, essentially making a star shape. If the star is yellow that means everything is good. But, if a star is red, there may be a problem with an edge/face not being tangent or collinear. Star points also determine how a t-spline will be converted to BREP. When a t-spline is converted to BREP, it will split into separate surfaces at each star point.
On the other hand, t-points are areas where faces converge to make a t-shape. T-Points are typically the areas where faces converge in a perpendicular way, making a “T” shape.
3. Switch to the Box Display Mode
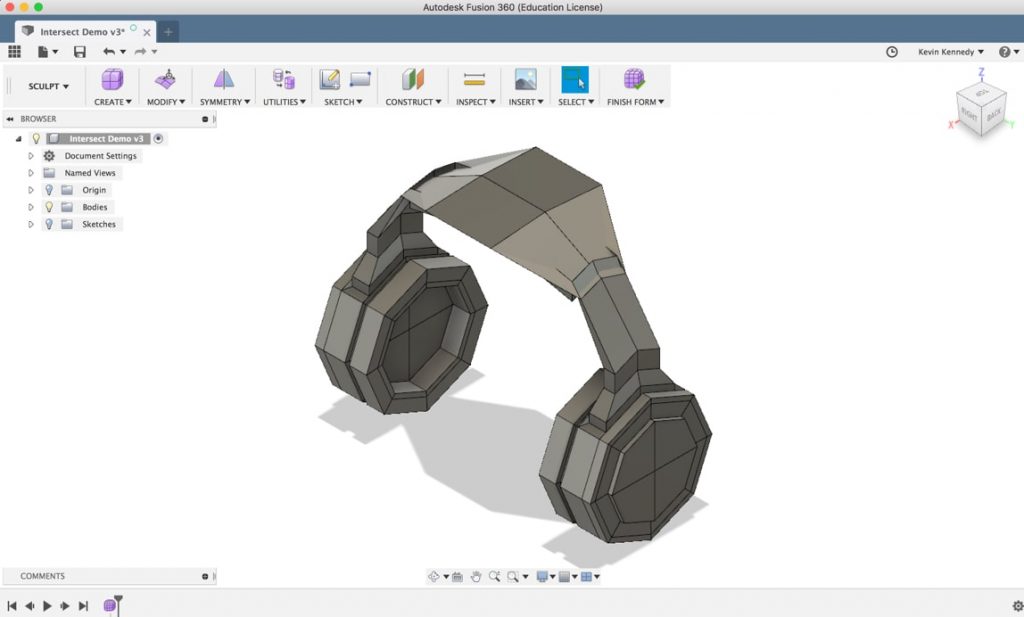
After you check the “repair body” tool to see if it will fix any errors, the next thing to do is switch the model to the box display mode by hitting CTRL + 1 on mac or Option + 1 on Windows. You can also switch to box mode by selecting the “utilities” dropdown list, then select “display mode.” Then, in the display mode dialog box, you can select the first icon, which is the “box display.”
Using the box display mode will not only make it easier to find the self-intersecting errors, but it will also help you select the correct faces in order to fix them.
This headphone example model is symmetrical, so I’ll turn symmetry on in order to save(keyboard shortcut CMD/CTRL+S) Saves the file that is currently open. More time. This way I’ll just have to fix the one side and the other will update accordingly. To turn on symmetry select “mirrorMakes a mirrored copy of selected faces, features, bodies, or components at equal distances across a plane. Select the objects to mirror then the plane to mirror around. More” from the symmetry drop-down list. Then click first on one side of the model, and then click (second) on the opposite face. Then, you’ll see green symmetry lines appear, showing where the symmetry lines are.
4. Move the Faces and Edges
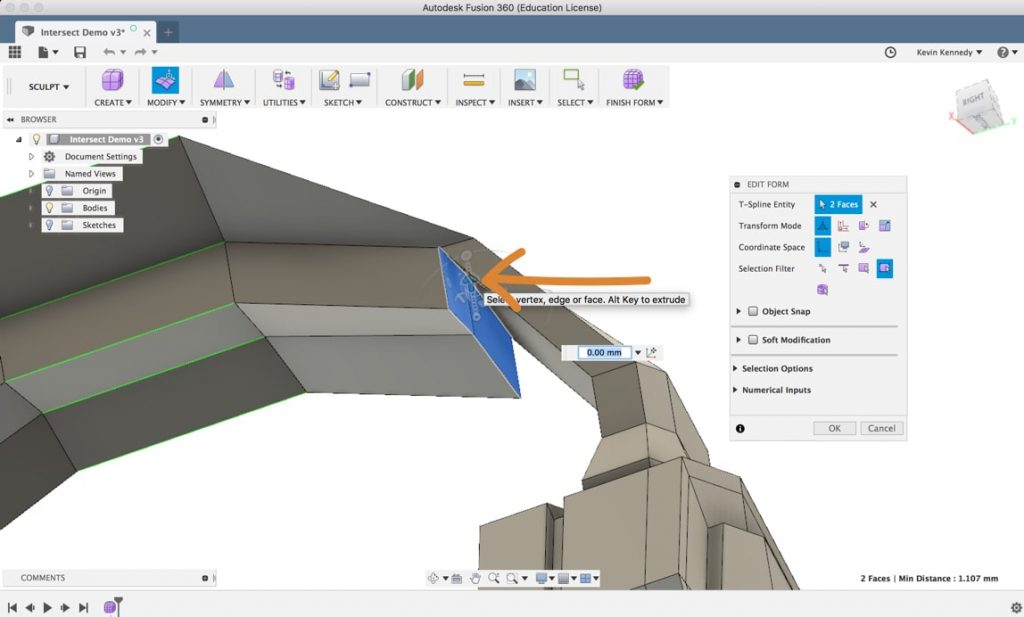
Once you have box mode on, and symmetry if applicable, you’ll want to zoomZooms in and out as the mouse is moved from left to right. More in on the faces that need to be fixed. Then, hold down the shift key on your keyboard and select the faces that appear to be intersecting.
Next, right click and select edit form.
You’ll want to use any of the edit form icons to move them away from the intersecting faces. (If you’re not familiar with the edit form icons then check out my video on them.) I think you’ll find the single axis arrow to be the most useful when trying to move faces away from the intersection point.
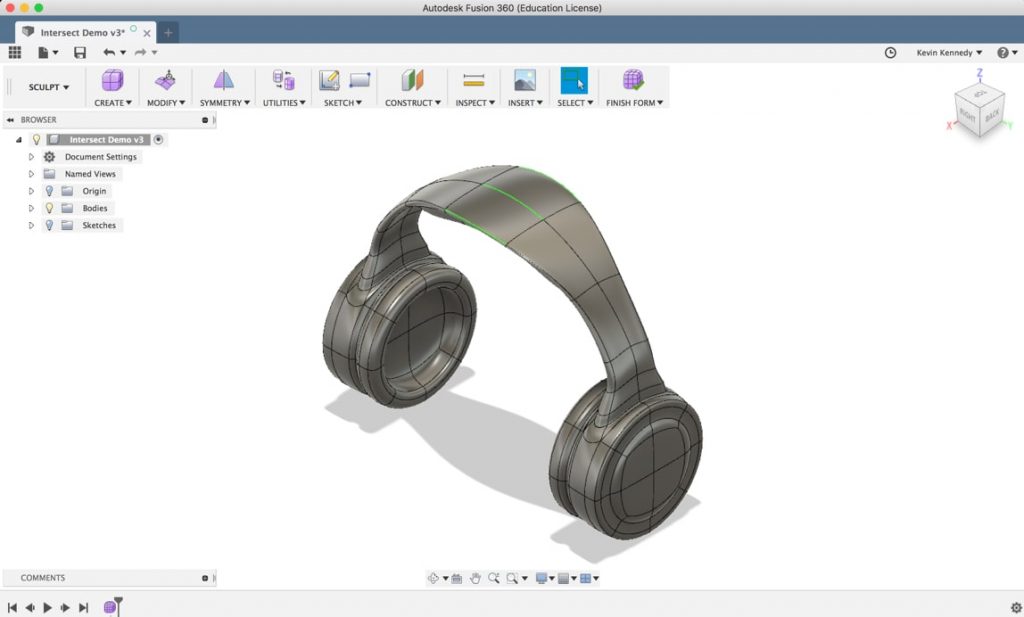
After the faces have been moved away it’s time to check if it has fixed the error message. You can click “okay” in the edit form dialog box to confirm the changes. Then hit CTRL + 3 (Mac) or Option + 3 (Windows) to switch back to the “smooth display” mode.
At this point, you should be able to tell if the faces look like they are no longer intersect.
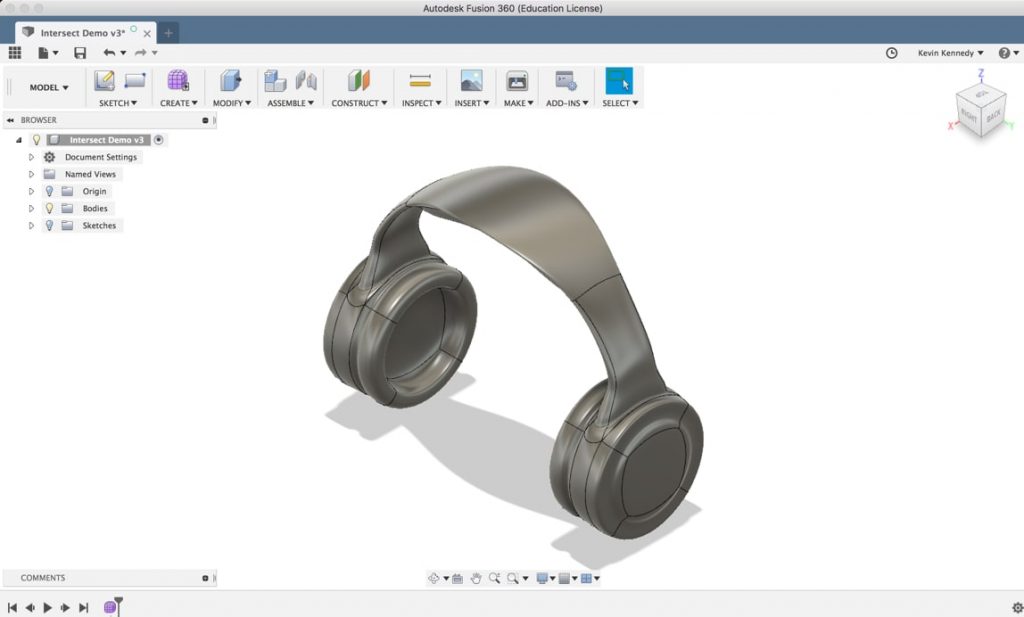
5. Repairing Self-Intersecting Bodies Checklist
If you ever get a self-intersecting error in the Sculpt environment then I recommend following these core steps:
- Take note of where the self-intersecting errors are (highlighted in red)
- Check the repair body tool
- Switch to the box display mode
- Manipulate the intersecting faces with the edit form manipulators
- Check to see if your model will now convert. If not, repeat the previous steps until the faces are no longer intersected.
Prefer to learn by video?
Watch my YouTube tutorial on fixing the Self-Intersecting T-Spline Error.
Leave a Reply