Fusion 360’s new geometric pattern tool makes it easy to generate patterns with circles, squares, and other geometric shapes. Create a pattern with size and distribution gradients across a face on a solid body in Fusion 360.


Example using Fusion 360’s Geometric Pattern feature
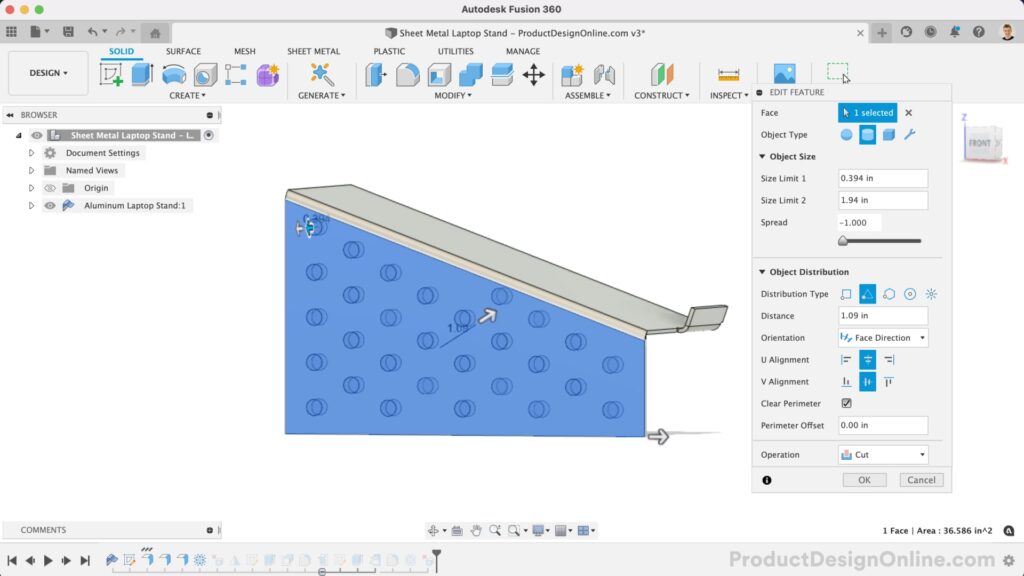
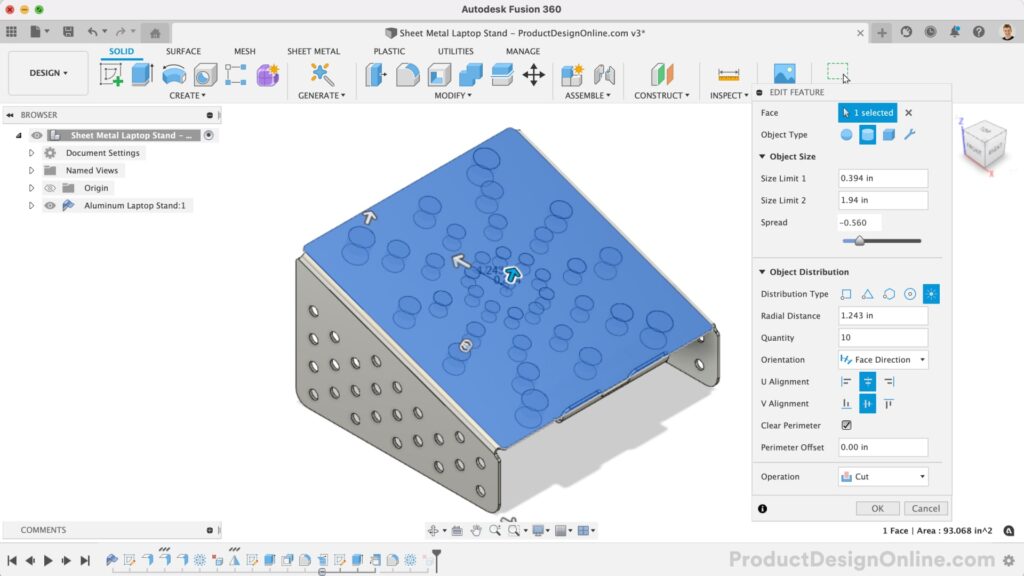
Watch Kevin use the Geometric Pattern tool in Fusion 360 to quickly create a pattern on a sheet metal laptop stand. In a matter of seconds, Kevin is able to create vent holes on the top of the laptop stand, as well as aesthetic holes on the sidewalls of the sheet metal laptop stand.
Access Geometric Pattern Feature in Fusion 360
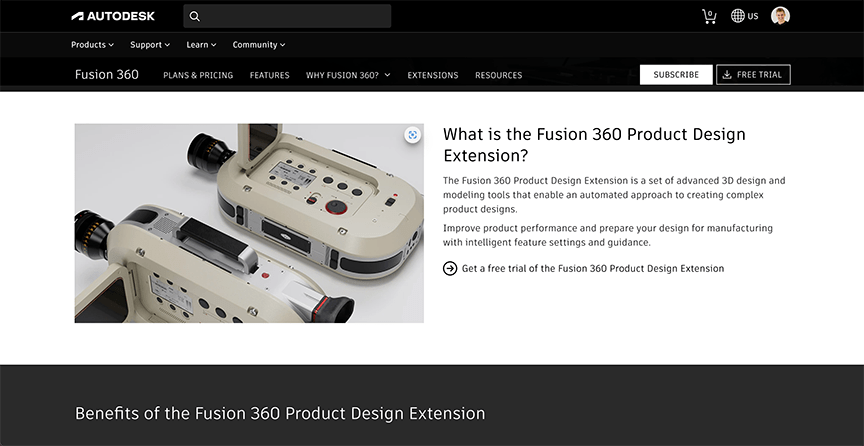
Important: You must have the Product Design Extension enabled.
In the Design workspace, select the Plastic tab > Create > Geometric Pattern. You can also access the Geometric Pattern from the shortcuts box. Press keyboard letter S > type “Geometric Pattern” > Return key.
Use the Geometric Pattern Feature in Fusion 360
- Select a Face on a solid body.
- Select the Object Type to pattern across the selected face(s):
- Sphere: Patterns a primitive sphere.
- Cylinder: Patterns a primitive cylinder.
- Box: Patterns a primitive box.
- Custom: Patterns a custom object.
- Specify the minimum and maximum size of the pattern objects in In the Size Limit 1 and Size Limit 2 fields.
- Specify a Spread value to control the rate of transition from one size limit to the other.
- Select a Distribution Type:
- Rectangular: Distributes objects across the faces in a repeating rectangular pattern.
- Triangular: Distributes objects across the faces in a repeating triangular pattern.
- Hexagonal: Distributes objects across the faces in a repeating hexagonal pattern.
- Circular: Distributes objects across the faces in a concentric circular pattern.
- Radial: Distributes objects across the faces in a linear radial pattern.
- For the Rectangular pattern type, select the Spacing Type and adjust the associated settings:
- Increment: Spaces objects in the pattern at the specified distance relative to each other.
- Distance: Specify the distance value between each object in the pattern.
- Extent: Spaces objects in the pattern evenly over the specified distance.
- Quantity: Specify the number of objects to spread evenly over the extent of the pattern.
- Increment: Spaces objects in the pattern at the specified distance relative to each other.
- For the Circular and Radial pattern types, specify the Radial Distance.
- Select the pattern Orientation:
- Parallel Direction: Places objects without rotation.
- Face Direction: Places objects aligned to faces direction.
- Select the U Alignment:
- Align Left: Aligns objects in the pattern to the left of the face, relative to its U direction.
- Align Center: Aligns objects in the pattern to the center of the face, relative to its U direction.
- Align Right: Aligns objects in the pattern to the right of the face, relative to its U direction.
- Specify a U Offset value to offset the pattern from the edge of the face in the U direction. Select the V Alignment:
- Align Bottom: Aligns objects in the pattern to the bottom of the face, relative to its V direction.
- Align Middle: Aligns objects in the pattern to the middle of the face, relative to its V direction.
- Align Top: Aligns objects in the pattern to the top of the face, relative to its V direction.
- Specify a V Offset value to offset the pattern from the edge of the face in the V direction.
- Check Clear Perimeter to remove incomplete objects from the perimeter of the selected faces.
- Specify an Offset Perimeter value to offset the pattern from the boundary of selected faces.
- Select an Operation, and adjust its associated settings:
 Join: Combines the new body with an existing body.
 Cut: Removes an area from an existing body.
- Objects to Cut: Check or uncheck objects to cut.
 Intersect: Creates a body at the intersection of an existing body and the new body.
- Objects to Cut: Check or uncheck objects to cut.
 New Body: Creates new bodies in the active component.
- Click OK.
Note: Change the operation to Cut to remove the geometric pattern from the existing solid bodies.
Fusion 360 Product Design Extension
The Geometric Pattern feature is part of the Product Design extension. Extensions are a flexible way to access additional capabilities in Fusion 360.
The Fusion 360 Product Design Extension includes a number of advanced 3D design and modeling tools that automate creating complex product designs.
Autodesk offers access to the Product Design Extension (and the other extensions) with both a monthly subscription and an annual subscription.

Transcript
Let’s now finish off the design by adding some cutouts with the new Geometric Pattern feature. These cutouts will serve both as vent holes as well as an aesthetic choice.
If you don’t have the Product Design extension, then you can sketch out a geometric pattern on the top planar face, using Fusion 360’s native sketching tools or by inserting an external pattern in the form of an SVG or DXF file.
Included in the Product Design extension is the “Geometric Pattern” feature, where we can quickly select a face and define the pattern’s settings.
A handful of settings help automate the process and make it much quicker to test out different geometric patterns. Best of all, once we’re happy with the settings, we can change the operation to Cut which will cut the pattern out of the Sheet Metal body.
If needed, you can also choose to delete any unique instances by selecting their faces, followed by the Delete key. I like to use the “Face Priority” selection filter, which makes it easy to only select faces.
Notice “Delete Face” is a parametric feature and recorded in our timeline.
In my final design, I rolled the timeline marker before the Mirror command and did a second Geometric Pattern on the side flange. Because Fusion 360 is parametric, this additional pattern is now included in the Mirror command without having to do anything.
Leave a Reply