1. Choosing the Right 3D Printer
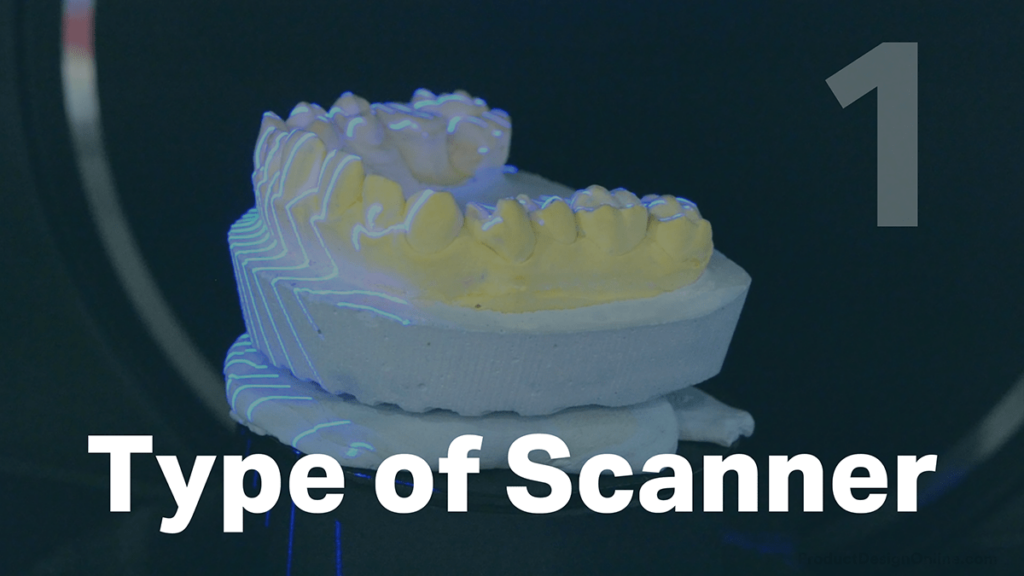
Choosing the right 3D scanner for your project can make all the difference. There are more than 8 types of 3D scanning technologies, but two of the most accessible ones include structured light and photogrammetry.
Photogrammetry is the easiest barrier to entry as it requires only a modern-day smartphone. You take many photos – often 100 or more – that are then stitched together with software.
Structured-light 3D scanner projects bars or blocks of light onto the desired object. The built-in sensors look at the edge of the light patterns as it hits the desired object and calculate the distance of every point in the field of view.
2. Free of Black or Reflective Surfaces
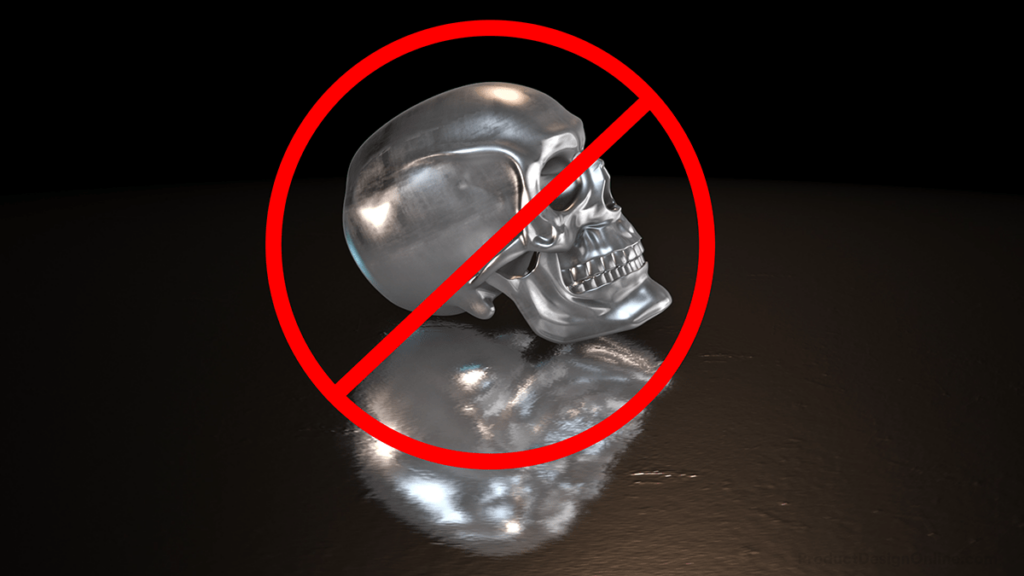
Structured light scanners do not work well with dark or shiny surfaces, as they’ll either absorb or reflect the light.
Traditionally, people used baby powder or chalk to cover up the part before scanning. However, this often creates a mess and can cause non-uniform surfaces.
For a better result, I recommend aerosol sprays designed specifically for 3D scanning.
3. Controlled Environment
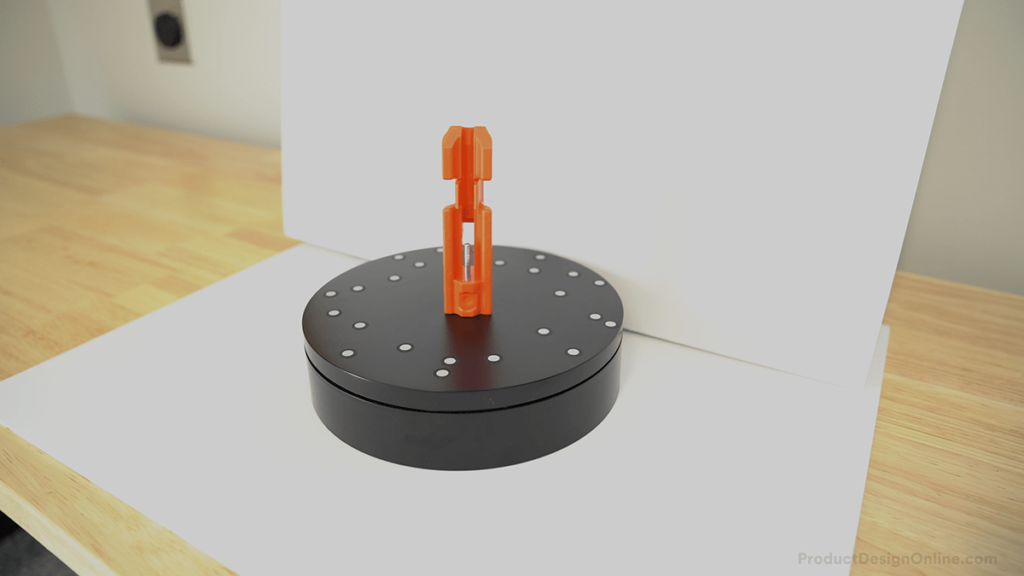
Once the object’s surface is ready, you should double-check that the object is placed in a controlled environment.
This means a space with sufficient lighting, but out of direct sunlight that may change throughout the scanning process. The lighting should also be diffused, meaning there are no spotlights creating hard shadows.
Choose a plain and non-reflective background and table, when applicable. This will help the scanner capture the object’s shape without confusing the surroundings.
4. Use Reflective Markers
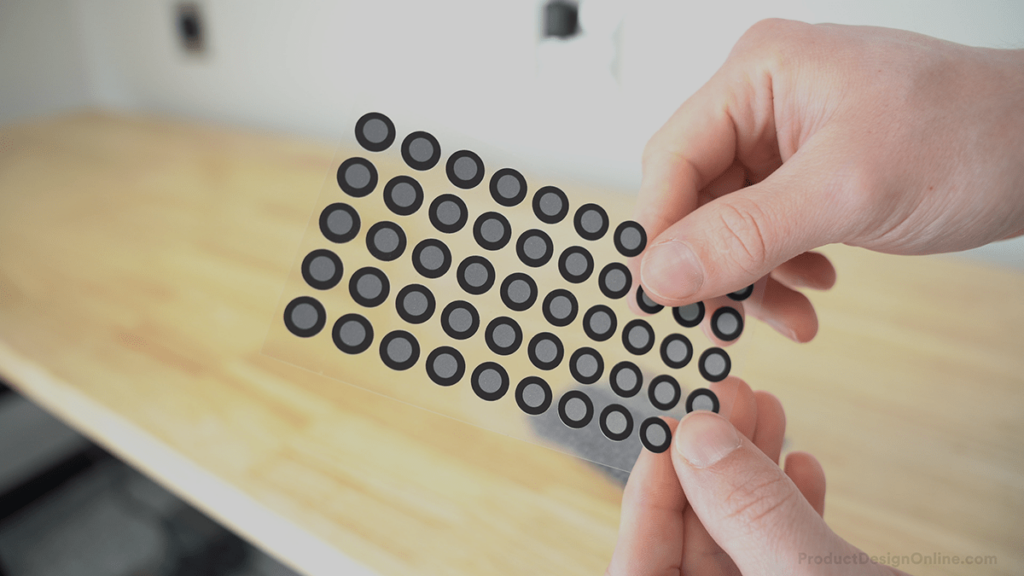
In addition to the surface and background prep, you may need to consider using reflecting markers. These are also known as positioning targets and are small stickers that have a reflective circle in the middle, with a black outer ring.
It’s critical to place the reflective markers randomly. Never place them in rows or evenly spaced.
As a general rule, make sure the scanner will be able to see at least 4 markers at all times.
As you’re scanning, the 3D scanner will detect these high-contrast markers to help locate the distance and orientation in 3D space.
Markers can help improve the accuracy of the scan and can also help you understand what areas are being detected by the scanning software. For example, Shining 3D’s software will indicate the markers with red.
When scanning small objects, you can place markers on the turntable or platform itself.
5. Scan from Multiple Angles
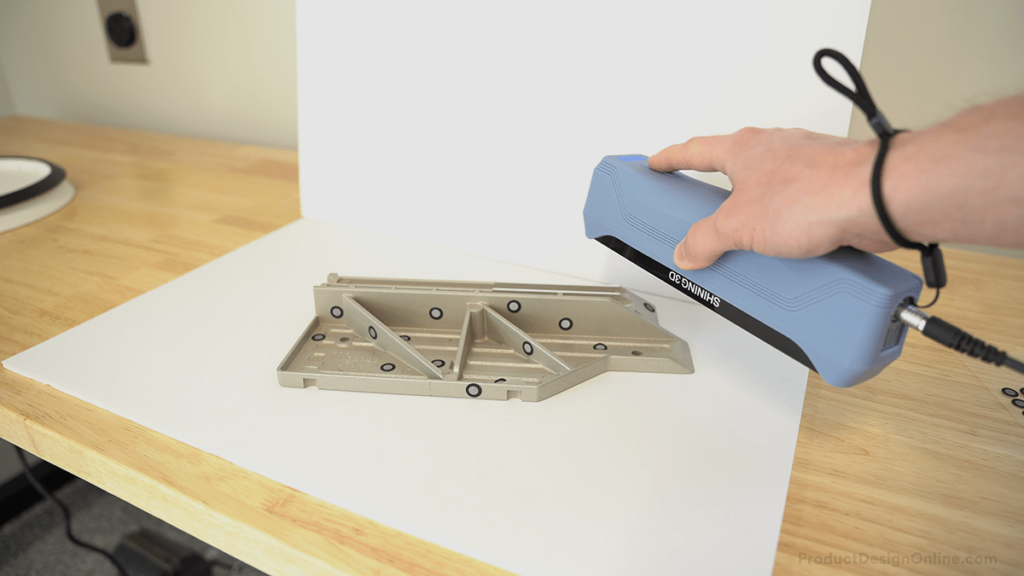
When 3D scanning, be sure to scan from multiple angles to capture all the details of an object. This is another area where light-based scanners excel when compared to photogrammetry.
You can capture 3 to 4 views from each angle, ensuring there is sufficient data to create an accurate 3D model.
A great benefit to light scanning is that you don’t have to worry about moving around the object in increments. In fact, with smaller models, you’ll find it works better to slowly rotate the model back and forth, to capture the finer details.
6. Refine Your Software Settings
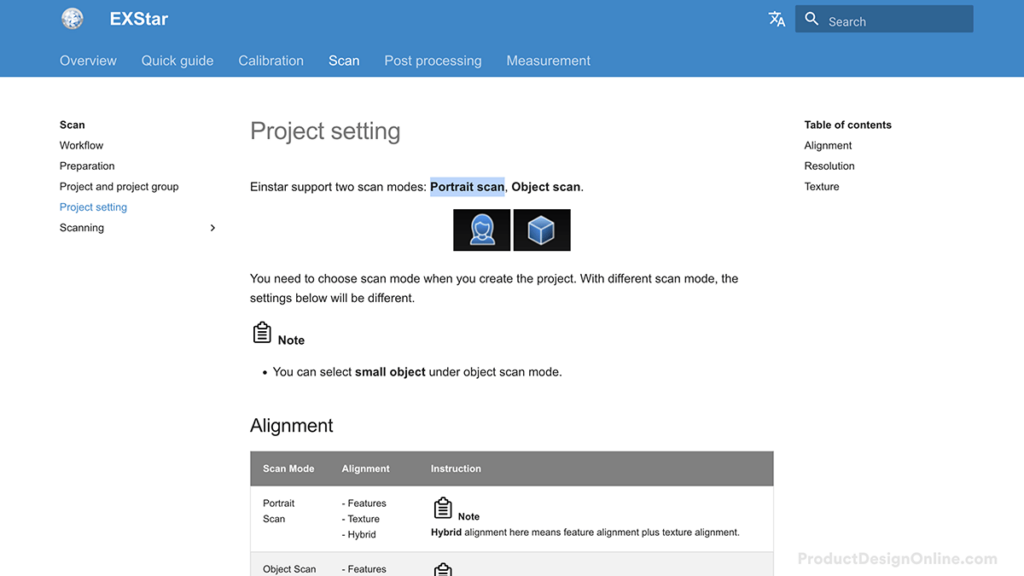
3D scanners typically provide their own software. An often overlooked aspect is making sure you have the right settings based on the desired scan results.
Many will provide a ‘portrait’ or ‘human’ scan mode if you intend to 3D scan a person. This will help the software look for eyes and other features, resulting in a better scan.
Otherwise, you’ll often need to choose the alignment type. The feature-based alignment will rely on the geometric features of the model. This does not work well for objects that are more organic.
Texture alignment uses surface texture to help align the scans. If your object is smooth or lacks texture throughout it, this approach is not ideal.
You’ll need to explicitly state when you’re using markers – or the stickers that I discussed earlier.
Many software platforms will allow hybrid options that use a combination of features, textures, and markers to align them. This is often preferred when accuracy is desired.
Ultimately, you’ll need to play around with these settings to find what works best for your project.
7. Refine the Cloud Point Data
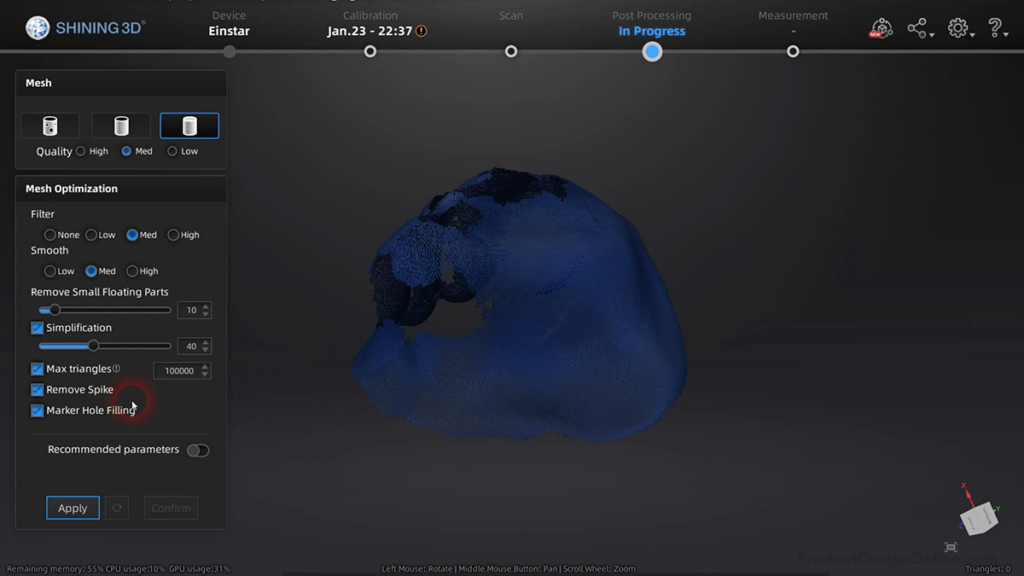
An often overlooked part of the process is post-processing the model before it gets converted to a mesh file.
A point cloud is a discrete set of data points in space, which represent the 3D shape from the 3D scan. It’s best practice to edit the ‘point cloud’ by removing all unnecessary information.
Start by removing any unwanted background information.
You’ll also want to consider if your final object needs a perfectly planar surface to sit on. When that’s the case, create a cutting plane that slices the desired bottom of the object.
You’ll often find different optimization settings after converting the file to an STL or OBJ mesh file.
Some software will aim for the lowest file size, so be careful of default settings and make sure the selected resolution doesn’t affect your desired tolerance.
Transcript
Today we’ll discuss 7 essential tips to make your 3D scans a success!
[1] Choosing the right 3D scanner is the first step to achieving the desired results. There are more than 8 types of 3D scanning technologies, but two of the more accessible ones include structured light and photogrammetry.
Photogrammetry, which I discuss in another video, is the easiest barrier to entry as it requires only a modern-day smartphone. However, for good results, it relies on cloud processing and often only works well for small and medium objects, with limited texture. Often times hundreds of photos are needed, which makes the scanning process longer than others.
Another downside is that you typically have to keep the object stationary. All in all, photogrammetry does not provide the accuracy that many are looking for.
On the other hand, a Structured-light 3D scanner projects bars or blocks of light onto the desired object. The built-in sensors look at the edge of the light patterns as it hits the desired object and calculate the distance of every point in the field of view.
Light-based scanners used to cost upwards of $10,000, but they can now be purchased for under $1,000, such as the handheld Einstar 3D scanner.
Another benefit is that structured light scanners can be handheld or mounted to a tripod.
[2] Ensure your desired object is free of black or reflective surfaces.
Structured light scanners do not work well with dark or shiny surfaces, as they’ll either absorb or reflect the light.
Traditionally, people used baby powder or chalk to cover up the part before scanning. However, this often creates a mess and can cause non-uniform surfaces.
For a better result, I recommend checking out aerosol sprays designed specifically for 3D scanning.
These sprays come in light matte colors and magically disappear by themselves – meaning zero cleaning is required. They also self-level, making less variance in your final dimensions.
[3] Once the object’s surface is ready, you should double-check that the object is placed in a controlled environment.
This means a space with sufficient lighting, but out of direct sunlight that may change throughout the scanning process. The lighting should also be diffused, meaning there are no spotlights creating hard shadows.
Choose a plain and non-reflective background and table, when applicable. This will help the scanner capture the object’s shape without confusing the surroundings.
Ensure the object is fastened down or heavy enough that it won’t vibrate or topple over. This is critical when 3D scanning parts with a desired tolerance.
[4] In addition to the surface and background prep, you may need to consider using reflecting markers. These are also known as “positioning targets” and are small stickers that have a reflective circle in the middle, with a black outer ring.
It’s critical to place the reflective markers randomly. Never place them in rows or evenly spaced.
As a general rule, make sure the scanner will be able to see at least 4 markers at all times.
As you’re scanning, the 3D scanner will detect these high-contrast markers to help locate the distance and orientation in 3D space.
Markers can help improve the accuracy of the scan and can also help you understand what areas are being detected by the scanning software. For example, Shining 3D’s software will indicate the markers with red.
When scanning small objects, you can place markers on the turntable or platform itself.
Markers can also be used as a method to clean up the 3D scan in post-processing. For example, I used the markers to determine the desired cutting plane.
[5] When 3D scanning, be sure to scan from multiple angles to capture all the details of an object. This is another area where light-based scanners excel when compared to photogrammetry.
You can capture 3 to 4 views from each angle, ensuring there is sufficient data to create an accurate 3D model.
A great benefit to light scanning is that you don’t have to worry about moving around the object in increments. In fact, with smaller models, you’ll find it works better to slowly rotate the model back and forth, to capture the finer details.
[6] 3D scanners typically provide their own software. An often overlooked aspect is making sure you have the right settings based on the desired scan results.
Many will provide a ‘portrait’ or ‘human’ scan mode if you intend to 3D scan a person. This will help the software look for eyes and other features, resulting in a better scan.
Otherwise, you’ll often need to choose the alignment type. Feature-based alignment will rely on the geometric features of the model. This does not work well for objects that are more organic.
Texture alignment uses surface texture to help align the scans. If your object is smooth or lacks texture throughout it, this approach is not ideal.
You’ll need to explicitly state when you’re using markers – or the stickers that I discussed earlier.
Many software platforms will allow ‘hybrid’ options that use a combination of features, textures, and markers to align them. This is often preferred when accuracy is desired.
Ultimately, you’ll need to play around with these settings to find what works best for your project.
Defining the resolution can also impact the amount of detail and accuracy of your final scan. As a general rule, you’ll want to use a 1mm resolution as a starting point for portrait scans.
Object scans are typically done with a resolution as small as 0.1mm for smaller objects, while larger objects, such as an entire car, rely on a larger resolution, such as 3mm. Choosing a resolution will vary depending on the size of your object and your desired tolerance.
Keep in mind that the resolution and quality of your scan are also dependent on your background and model prep that I discussed earlier.
[7] An often overlooked part of the process is post-processing the model before it gets converted to a mesh file.
A point cloud is a discrete set of data points in space, which represent the 3D shape from the 3D scan. It’s best practice to edit the ‘point cloud’ by removing all unnecessary information.
Start by removing any unwanted background information.
You’ll also want to consider if your final object needs a perfect planar surface to sit on. When that’s the case, create a cutting plane that slices the desired bottom of the object.
You’ll often find different optimization settings after converting the file to an STL or OBJ mesh file.
Some software will aim for the lowest file size, so be careful of default settings and make sure the selected resolution doesn’t affect your desired tolerance.
When available, I recommend selecting any features that automatically remove small floating parts or fill small pin holes. These are often overlooked and can cause issues when using the 3D mesh in other software.
[Upbeat Music]
If a light structure scanner is not in your budget, take a look at this video to get the most of 3D scanning for free with your smartphone.
[End Upbeat Music]