Table of Contents
Save $39 off the JGMaker 3D Printer with coupon code KEVIN39P (on the official store only) or click here to head straight to checkout.
If you’re interested in picking this 3D printer up for yourself, check out the following shopping links*.
Pros & Cons of JGMaker Magic 3D Printer
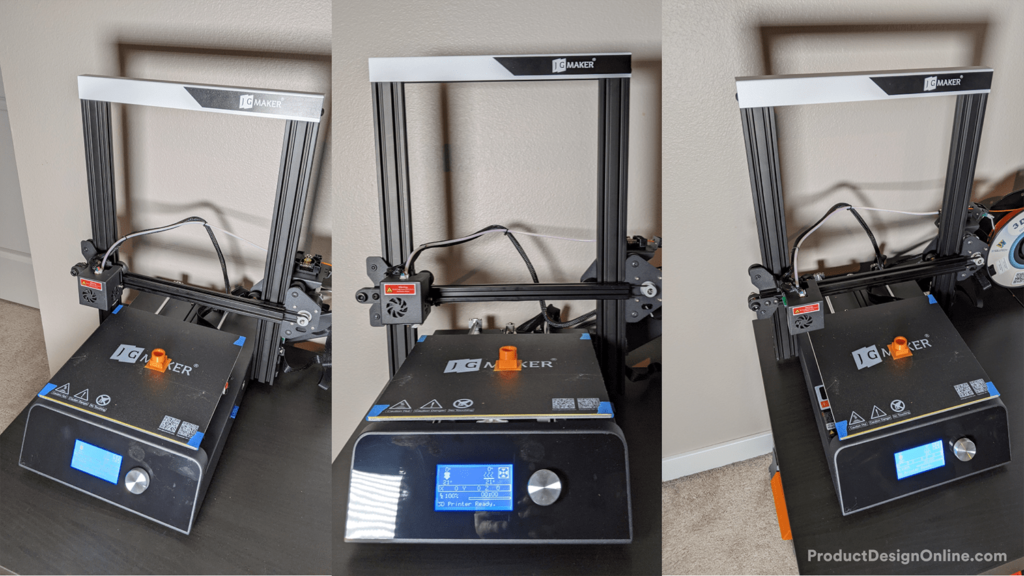
JGMaker Magic is ready to compete with popular alternatives, such as the Ender 3 Pro. At a glance, these printers look very similar in both shape and size. At a closer look, you’ll find some features that JGMaker has that are not available on the Ender 3 and other 3D printers at the same price point.
Pros
- Incredibly affordable
- Decent print volume
- High-quality prints are achievable
- Resume printing feature
- Filament detection sensor
- Easy assembly
- Compact design
- Dual Y-axis design
Cons
- Build-plate not magnetic
- Adhesion (sometimes) needed to get prints to stick to bed
- Side filament holder (if size is an issue)
Verdict
After building the JGMaker Magic 3D printer, we were impressed with the quality of prints right out of the box. It required little to no calibration and tweaking, thanks to its semi-auto leveling feature. All in all, the JGMaker Magic 3D printer is an extraordinary 3D Printer for beginners looking to purchase one in the sub-$200 price range. For more expensive printers, see the other 3D Printers we recommend.
There are a few features that really make the JGMaker Magic 3D printer stand out from other printers in this price range. The auto-feeding technology makes it easy for beginners to load and unload filament. In addition, the filament detection sensor will pause and save the printing from running out of filament during the printing process. Typically, filament detection is only found on $500+ printers, and we’re impressed with how well it works on Magic.
The 3D Printer is easy to assemble, although the manual did not come in the box and had to be viewed or downloaded online. The dual Y-axis rail provides Magic with a stable print bed, something that often becomes a problem with affordable 3D printers.
The spool holder sits on the right, which is something that may be a problem for some, particularly if you’re planning to put this 3D printer in a full enclosure. However, this design does allow you to replace the filament quickly. Worst case, one could always 3D print a top-load spool holder that sits on the top gantry, mimicking the other 3D printers in this price range.
There are certainly better 3D printers available on the market, but few come close to the quality and ease of use at this price point (less than $200). This printer may require some upgrades to the build platform, which is not magnetic, but they also sell an Ultrabase glass bed upgrade kit on their site.
Features
For the price point, the JGMaker Magic 3D Printer is packed with features, some of which are often only available to mid-level 3D Printers.
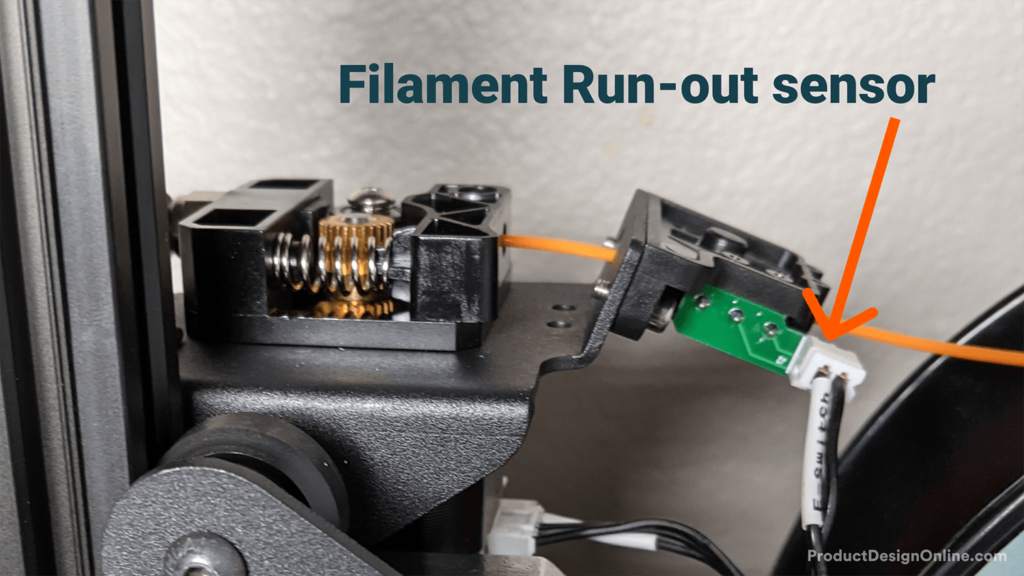
Filament Run-out Detection
Never worry about your filament running out in the middle of a 3D Print. The Magic includes a filament sensor that will detect the filament and pause the printer before it completely runs out. This allows you to swap filaments and resume printing, saving any prints that were currently in process.
Thermal Runaway Protection
Entry-level 3D printers, especially the cheap ones, run the risk of catching fire due to their cheap components and often lack of quality control. Fortunately, the Magic will put your mind at ease as it includes thermal runaway protection, which prevents the print temperature from getting out of control (it will shut off once it reaches a specific temperature).
Resume Printing
Power-outages are the enemy of additive manufacturing, especially with 3D printers. Fortunately, Magic includes a feature that will resume printing where the last print was stopped due to a power shortage. Such a feature is not new or unique to 3D printers, but it is typically not included with printers at this price point.
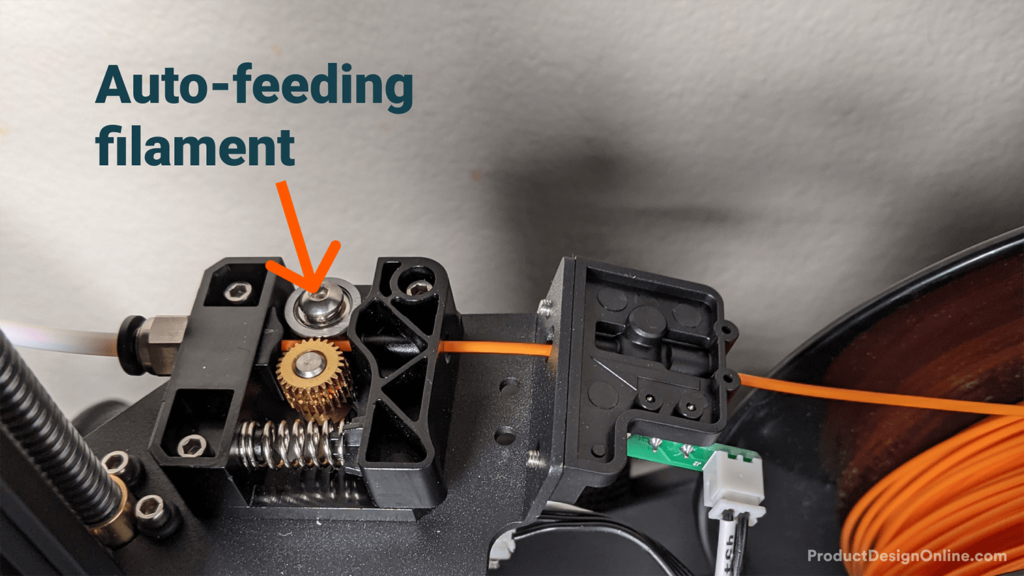
Auto-Feeding Filament
Affordable printers often require you to feed the filament directly into the hotend when unloading and loading filament. This experience is often frustrating for beginners, or when filament clogs in the hotend. Magic includes an auto-feeder that will pull/push the filament through the hotend, leaving your hands away from the hot extruder.
Dual Y-axis Rail
Entry-level printers often catch flack for their lack of rigidity. However, the Magic is one of the few to include a dual Y-axis rail on top of its all-metal base. This was one of the most rigid 3D printers we’ve built/used, and we’re impressed with the printing accuracy.
Semi-Auto Leveling Function
Although Magic does not have a fully automated leveling function, it does include an easy-to-use leveling process that will help you level the build (print) platform. By moving to 5 critical points (four corners and the center) it will make it easy to quickly level your build platform, without having to run custom G-code, as required by the Ender 3 printers
Technical Specifications
| Layer Resolution | 0.1mm |
| Layer Thickness | 0.05-0.3mm |
| Stock Nozzle Diameter | 0.4mm |
| Nozzle Temp | ≤245℃ |
| Heated Bed Temp | ≤110℃ |
| Print Speed | 10~120mm/s (suggested 60mm/s) |
| Input Voltage | AC110/220V (optional) |
| Output Voltage | 24V |
| Wattage | 200W |
| Supported Print Materials | PLA/ABS 1.75mm |
| Positioning Accuracy | X/Y: 0.012mm Z: 0.001mm |
| Connectivity Working Mode | SD Card or Data Cable |
| File Format | STL, OBJ, AMF, DAE |
| OS Compatibility | Microsoft Windows, Mac OS, Linux |
| Product Weight | 8KG (~17.6lbs) |
| Printer Size | 443x450x472mm |
| Package Weight | 9.6KG (~21lbs) |
| Package Size | 525x530x192mm |
In addition to the parts of the 3D printer, you will also find the following in the box:
- Test filament (white)
- Putty/Utility knife
- USB Stick (with test models)
- Alan Wrenches (required for assembly)
- A spare hotend nozzle
- Leveling card
- Wire (filament) cutters
Assembly
The JGMaker Magic 3D Printer is technically considered a kit because it does not come fully assembled. That said, the “kit” is a far-stretch, as it requires very little assembly, allowing you to be up and running in no time.
Some printers, including the Prusa i3 MK3S, come as kits or are fully assembled. On average, a Prusa kit will take about 8 hours to assemble. Contrary, the Magic printer took only 20 minutes.
The base of the 3D printer comes pre-assembled. You’ll be required to assembly the X and Z gantries, followed by attaching the Extruder to the Z gantry. With the provided instructions (online), we found this process to be quick and easy.
For us, the belt assembly was the only part that took a second glance. The pictures included in the instructions were not the clearest and we had to figurine out how the belt clamped together using experience from other 3D printers. This could be a challenge for someone brand new to 3D printing or CNC machines in general.
Unfortunately, the JGMaker Magic 3D printer is new to the market so you will not find much assembly content on YouTube or elsewhere. In such cases, you may be able to reference an Ender 3 assembly video, or a similar printer, to get past any assembly hurdles.
Design
The JGMaker Magic 3D printer is a well-built “tank” compared to other 3D printers in its price-point. We found this printer’s base to be well-built compared to the Ender 3, which often receives complaints about their wobbly base.
The Dual-Y system (mentioned above) has proven to provide a rigid build platform, which helps increase print quality and accuracy. This adds a great degree of stability to the machine and lowers the chances of needing to re-level the build platform after removing a print.
With an Extruded aluminum frame, one could add accessories to the side and top gantries as needed. Though, you won’t find many modifications available online since the JGMaker community is smaller (but growing!) when compared to other Chinese Manufacturers.
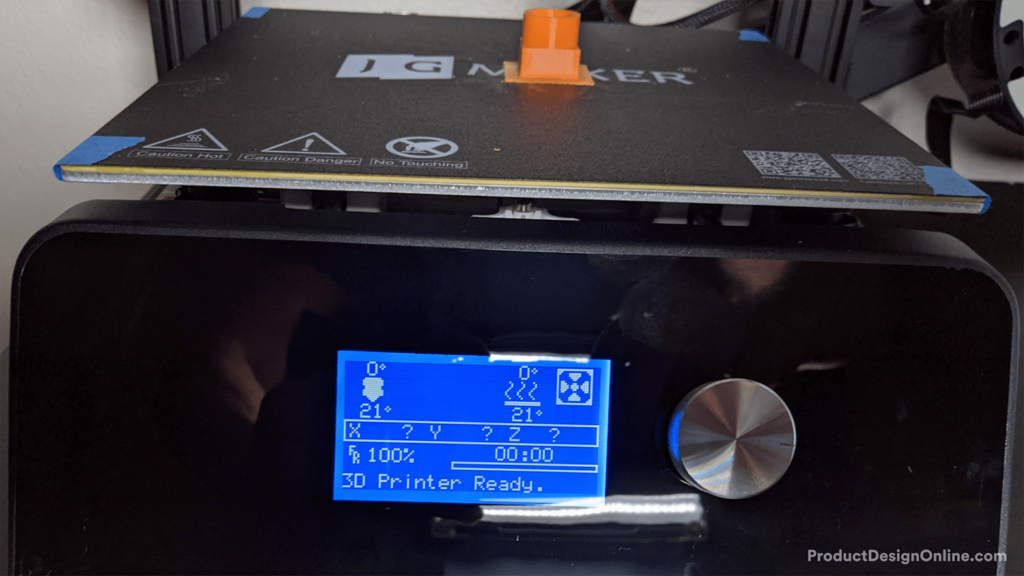
The LCD panel and control knob are well manufactured and intuitive when compared to other entry-level 3D printers. We found this control knob to be the sturdiness and most-sleek design out there, as many other printers we’ve tried have a 3D printed knob or one that makes it challenging to select menu items.
Lastly, we found the 3D Printer to be about average in terms of sound output while running. There are definitely 3D Printers that are loud (looking at you MakerBot), but Magic is comparable and bearable for anyone getting into a beginner-friendly 3D printer.
First Print
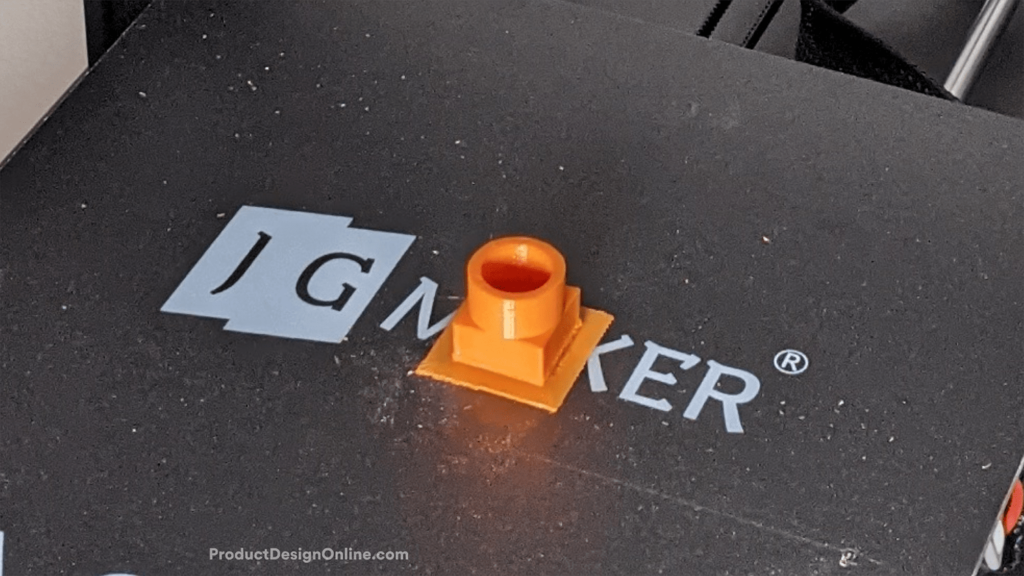
As someone who has been 3D printing for nearly 10 years, I was impressed with the quality of the first print. I leveled the build platform once and the first test print, which was the included cube, came out extremely well.
The temperature settings could certainly be tweaked to get a “crisper” edge, but the layer adhesion, accuracy, and the rest of the 3D print were all successful.
Software
The JGMaker Magic 3D Printer will work with any slicer, including the popular Utimlaker Cura (that we recommend). We could not find a pre-made Printer Profile (for Cura) online that included the best settings for this printer, but due to its closeness to similar printers, you can follow recommended print settings for the Crearlity Ender 3.
Cura 3D Printing slicer can be downloaded from Utlimaker’s website for free. Cura is available for both Mac, Windows, and Linux users.
For free models to download, check out Thangs.com, which boast a variety of 3D models, including many geared towards 3D printing hobbyist.
Where to Buy
Despite boasting mid-level features and a relatively capable 3D printer, the JGMaker Magic 3D Printer is available for a retail price of under $200. While the 3D printer certainly has some cons, this price makes it a bargain for anyone looking to get their first 3D Printer.
After spending some time assembling and printing on the JGMaker Magic 3D printer, we feel confident to recommend this machine to anyone on a budget or anyone who is looking to get their first FDM (FFF) 3D Printer.
There are many 3D Printer options out there, but few come close to including the number of high-quality features for this price point and friendly user experience.
If you’re interested in picking this 3D printer up for yourself, check out the following shopping links*.
Save $39 off the JGMaker 3D Printer with coupon code KEVIN39P (on the official store only) or click here to head straight to checkout.
We may earn a small commission if you purchase after clicking one of our affiliate links. We only recommend products that we’ve tested, use, and believe in.
Good afternoon, My name is Regina Bennett. The reason I bought this printer is I saw a project with resin and it looked like a woman diving into the ocean. I need to make the woman so I can start my project. Where can I find those types of models?
Hi Regina,
I’m not sure, but it’s worth checking out Thingiverse.com and Thangs.com if you haven’t already. Those sites are most popular among 3D printing hobbyists (for free 3D models).
Cheers,
Kevin
Can you please tell me how to clean the plate
Hi Michelle,
Can you elaborate on what’s on your build plate? Is it remnants from removing a 3D print or are you looking for general guidance to remove the completed 3D prints?
Cheers,
Kevin
I did not like this printer.It never ran more then 3 or 4 min. .I replaced the hot end and still did the same thing.I replaced the main board still did the same thing.I replaced the main board and all the wiring with Creality parts.
Hi Herman,
I’m sorry to hear that! Mine has been running without a hitch for over a year. It sounds like you may have received a dud. Did you try contacting the manufacture to see if they would give you a replacement?
Cheers,
Kevin
I just unpacked and assembled it and when it start to print after a while it stucks . How can i improve the problem ??
Hi Dawit,
Can you elaborate? Is the nozzle clogged?
Cheers,
Kevin
Hi! Can you perhaps give me an indication about the type of things you’ve printed with this?
I have a project where I need to print a cylinder tube with a 20cm diameter and 15cm height. Can this be achieved with this printer?
Hi Shanré,
The build volume is 12X12X12.6in or 30x30x32cm, so you should have no problem printing that!
Generally, I recommend avoiding printing up to a half inch or 1.5cm to the max build volume, as objects are more likely to fail and/or warp near the edges. Note that is a general recommendation and not specific to this 3D printer.
Regards,
Kevin