This tutorial is Sponsored by Xometry, Inc.
- What is Automated Modeling?
- Automated Modeling vs Generative Design
- Who Has Access to Automated Modeling?
- What Does Automated Modeling Produce?
- Where to Order Custom Parts?
What is Automated Modeling?

Automated Modeling is a new tool in Autodesk Fusion 360 that quickly generates design alternatives for connecting existing geometries in your design. Adding one of the alternatives to your design creates a parametric, solid body that is editable using the parametric timeline. You can further edit the results with the Form tools.
Using Automated Modeling intends to speed up the modeling process by suggesting different geometrical shapes that may complete your design – or that you can use as inspiration for a final design.
Automated Modeling vs Generative Design

While Automated Modeling and Generative Design have many similarities, they remain distinctly different.
Generative Design requires extensive technical know-how, extra cost due to cloud computing, and quite a bit of time to set up a single study.
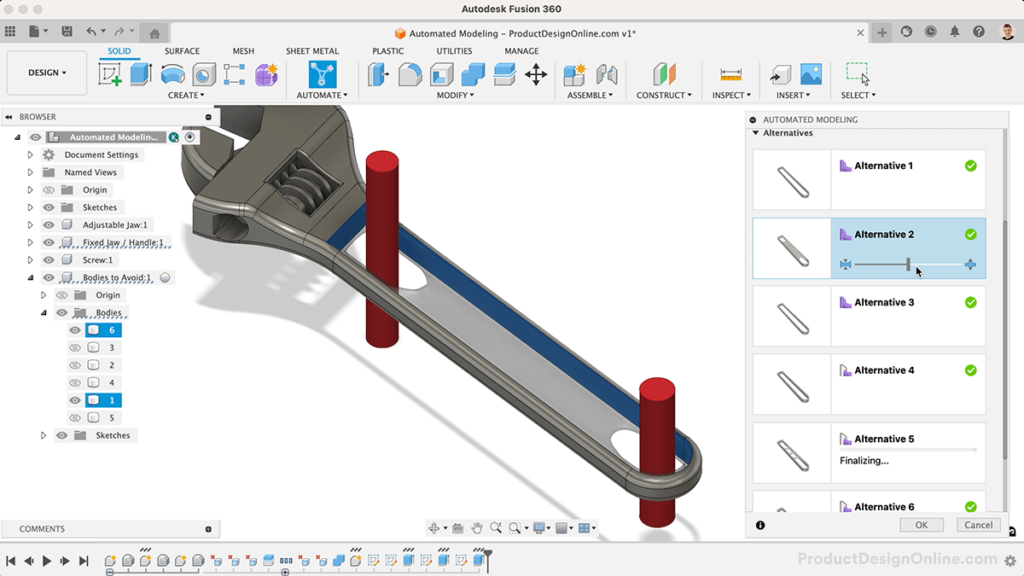
Contrary, Automated Modeling does not require extensive set-up time or technical know-how. Simply select the faces you want to be connected to and select any optional bodies to avoid. Selecting ‘Generate Shapes’ will initiate the automated modeling process and in a few minutes you’ll have 3-6 designs to review.
Who Has Access to Automated Modeling?
Currently, all Fusion 360 users on all license types (including the free Personal Use license) can access Automated Modeling.
Generative Design in Autodesk Fusion 360 is restricted to those on Commercial, Startup, or Education licenses. In other words, those on the free Personal Use license cannot access Generative Design.
What Does Automated Modeling Produce?

Automated Modeling generates two types of design alternatives:
 Smooth Connections – the solid body that is connected to the selected faces using rounded connections.
 Sharp Connections – the solid body that is connected to the selected faces using sharper, edge-like connections.
You can adjust the thickness of each alternative by adjusting the slider to the left to decrease and to the right to increase.
Once you select an alternative (outcome) > select OK > your body will be saved as a T-spline (form) in the parametric timeline. Edit the From to make modifications to the body.
Fusion 360 converts closed T-spline bodies to Solid BREP bodies, which means you can then manufacture your design, such as 3D Printing.
Where to Order Custom Parts?

Xometry provides custom, quick-turn production services for rapid prototyping and production parts. They offer services covering commercial-level 3D printing, CNC machining, Injection Molding, Urethane Casting, and so much more. Xometry also offers 100s of material and finish options, with no quantity minimums.
In addition to instant quotes, they provide a free Fusion 360 add-in that offers design for manufacturing feedback allowing you to make design improvements before submitting for manufacturing.
Xometry Discount Code
Get $50 OFF your first Xometry order with PDO’s custom referral link.
*This promotion applies to new customers only and on orders totaling $100 or more.
Transcript
In the future, AI tools will be so intuitive that anyone with an idea will be able to design physical products.
Artificial intelligence will eventually displace hundreds of thousands of highly skilled product designers.
As many of you have experienced, I think our jobs are safe for a little longer, given AI can’t even consistently turn our lights on. [Sorry, I don’t understand.]
Inspired by recent advancements in generative AI, I decided to set out on an experiment to see how much this 1907 design would change using today’s technologies.
Coupling software advancements with on-demand manufacturing being more affordable than ever, I was able to get several of the output designs produced on a cutting-edge $200,000 commercial 3D printer using a service called Xometry.
However, the AI didn’t just spit out the final wrench design but served as more of a creative assistant. We’ll look at a concept called “Automated Modeling,” which is not to be confused with Generative Design.
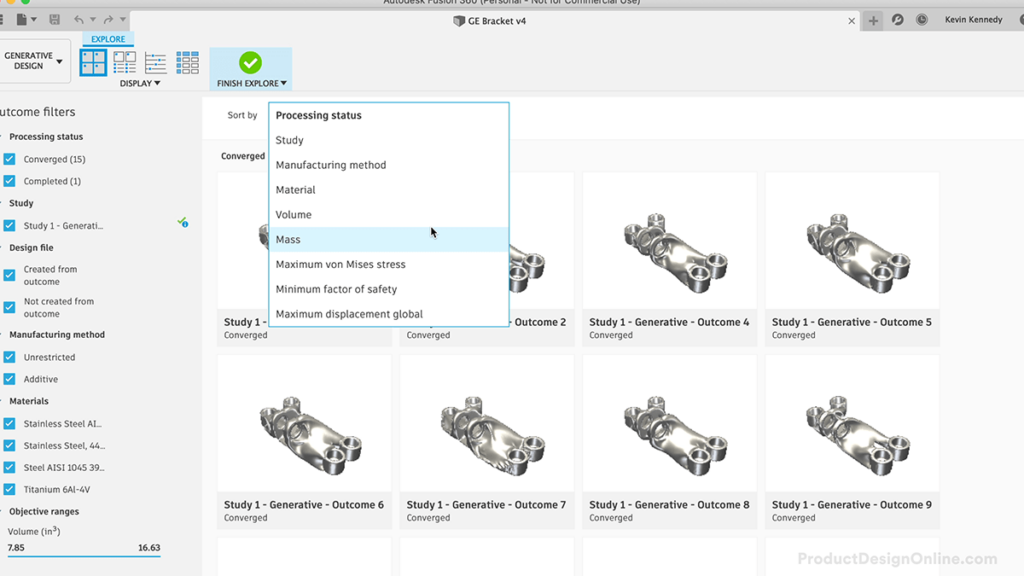
Generative Design can be traced back to the early 1970s, but it wasn’t accessible to the masses until more recently when we started seeing it in software, such as Autodesk Fusion 360. However, Generative Design requires extensive technical know-how, extra cost due to cloud computing, and quite a bit of time to set up a single study.
For this experiment, I used a newer tool called ‘Automated Modeling.’
While Generative Design aims to optimize designs for specific materials and manufacturing techniques, Automated Modeling intends to speed up the modeling process by suggesting different geometrical shapes that you can use to complete your design – or that you can use as inspiration for a final design.
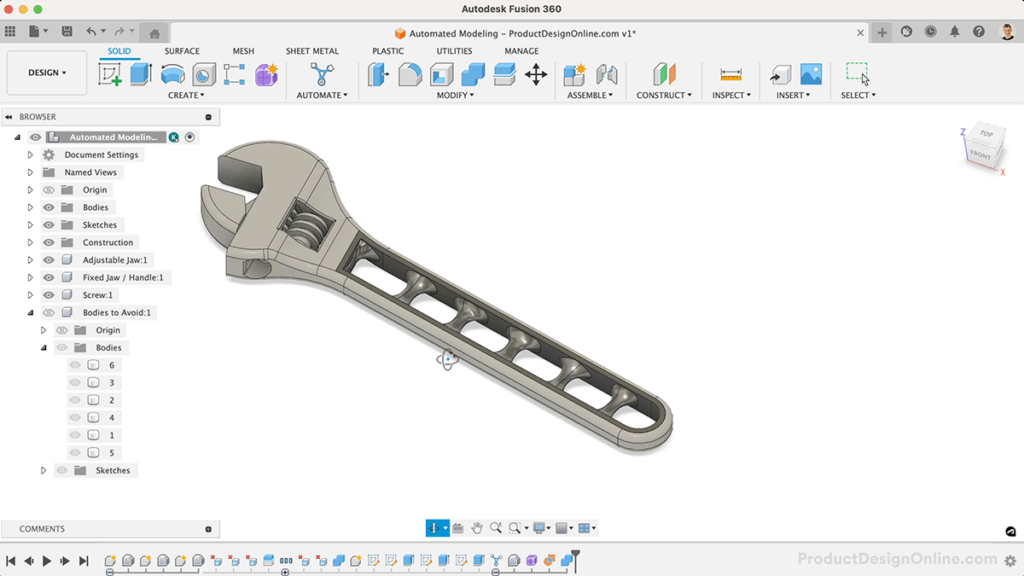
I started with a baseline model of the crescent wrench.
To start outputting designs, Automated Modeling requires the user to input a minimum of two faces to connect.
As a starting point, I was curious what it would come up with for the handle so I started by manually cutting out the existing material. This allowed me to select the minimum of two faces – one on each end – and then we just need to wait a few seconds while the shapes generate.
As you can see, the results were pretty basic given we only input two faces.
You can toggle between the generated outcomes and experiment by increasing or decreasing the thickness of each individual outcome.
Next, I was curious how different the results would be if I forced it to avoid simply connecting on each end.
I simply Extruded some cylinders and selected one on each end for the ‘Objects to Avoid’. Regenerate Shapes will process all new results accounting for the new inputs of bodies to avoid.
These second results were starting to get interesting, but I didn’t like the gaps on the side – and some of the results were starting to go beyond the basic handle shape.
To help constrain this further, we can add the additional inner faces as faces to connect.
This is when the results started to get more interesting. Remember to think of Automated Modeling as your creative assistant and not your replacement.
The cool thing about Automated modeling is that a selected option becomes a T-spline model. This means we can edit the Form tool in the parametric timeline, allowing us to further refine the design as needed.
Once we finish the Form, the model automatically converts to a solid BREP body that can be manufactured, including 3D printing.
I ended up ordering a version of this, but felt the design could be more ‘futuristic’. Although I didn’t have many real requirements for a final design, I was thinking about 3D printing this in metal, and finding some ways to reduce the material and weight of the design.
I edited the Automated Modeling feature a third time, this time selecting the additional cylinders.
After adjusting the thickness, I found another result that I liked. Given I wanted these wrenches to be workable, I knew I wasn’t going to make them at home on my consumer-level 3D printer.
Xometry, who is the sponsor of today’s video, offers a variety of on-demand manufacturing, including 3D printing, CNC, Injection Molding, and other services that otherwise wouldn’t be available to hobbyists and small business owners.
Aside from the quality, one of the reasons I like ordering parts with Xometry is for their instant quoting, including the ability to see prices within Fusion 360. There’s no hassle of waiting for someone to email you back and you can easily experiment with your project’s price and lead time.
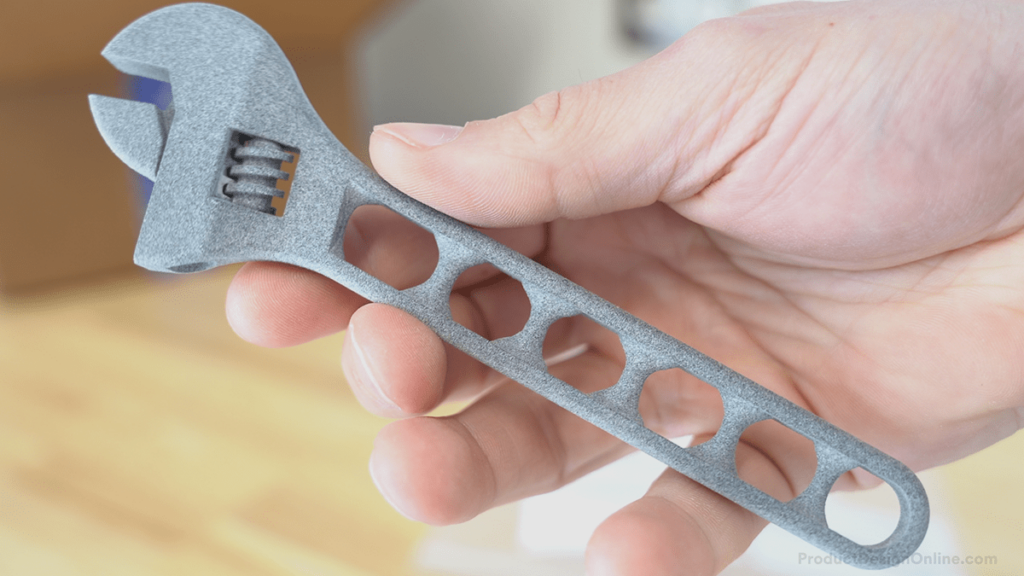
What surprises me, even more, is that I thought I’d have to wait in a month-long queue. In just a few days I received the box of 3D-printed parts. These were all made on a commercial HP MultiJet Fusion 3D printer.
Perhaps, one of the coolest parts of Automated Modeling is how quickly you can create organic results with as little as two connections and one blocker.
You can also experiment with some of Fusion 360’s demo files, including creating futuristic bike parts.
One important thing to keep in mind with Automated Modeling in Fusion 360 is that you still need to validate with Simulations or the full Generative Design feature set. Generative Design allows you to apply loads, constraints, and manufacturing methods to ensure it meets all the criteria. Automated Modeling doesn’t support that and really serves as just a starting point. However, you can send these output models to the Generative Design workspace for further refinement.
If you plan to 3D Print objects for strength, you may consider using lattice structures instead of Automated Modeling or Generative Design.
Many consider lattice designs to look futuristic, though they’re created with an entirely different intent.
Lattice structures in 3D printing help create lightweight designs with intricate repeating geometric patterns as support structures. Lattices can be printed as internal support structures or standalone parts.
In Fusion 360, you’ll find the Volumetric Lattice command within the Plastic tab, as it does require access to the Product Design Extension.
This feature allows you to simply select a 3D body and turn it into a lattice structure based on the cell shape.
You can also adjust the size, proportions, and position of the lattice.
I wanted the hole to remain open on the end of the wrench’s handle, so I used the Offset tab. It’s here that you can select edges to define an offset where the lattice will remain away from the selected object.
The lattice command only works with Fusion 360’s native additive manufacture setup, unless you first convert the model to a mesh file. I ended up exporting these as STLs and had one printed with some variables of the Gyroid pattern.
While Automated Modeling may be a long way from fully replacing a Product Designer, it can still be a lot of fun to experiment with when generating design ideas.
[Upbeat Music]
If you do end up playing around with Automated Modeling, let me know how your results turn out.
[End Upbeat Music]
Leave a Reply