This tutorial is Sponsored by Xometry, Inc.
- What is Xometry?
- Get Instant Quotes with the Xometry Fusion 360 Add-in
- 1. Download and Install the Xometry Fusion 360 Add-in
- 2. Activate the Xometry Add-in in Autodesk Fusion 360
- 3. Select the Desired Components
- 4. Define the Process, Material, and Finish
- 5. Review the Estimate and DFM Feedback
- 6. Change Process and Materials to Compare Estimates
- 7. View Xometry Instant Quote and Order Parts
- Video Transcript
What is Xometry?
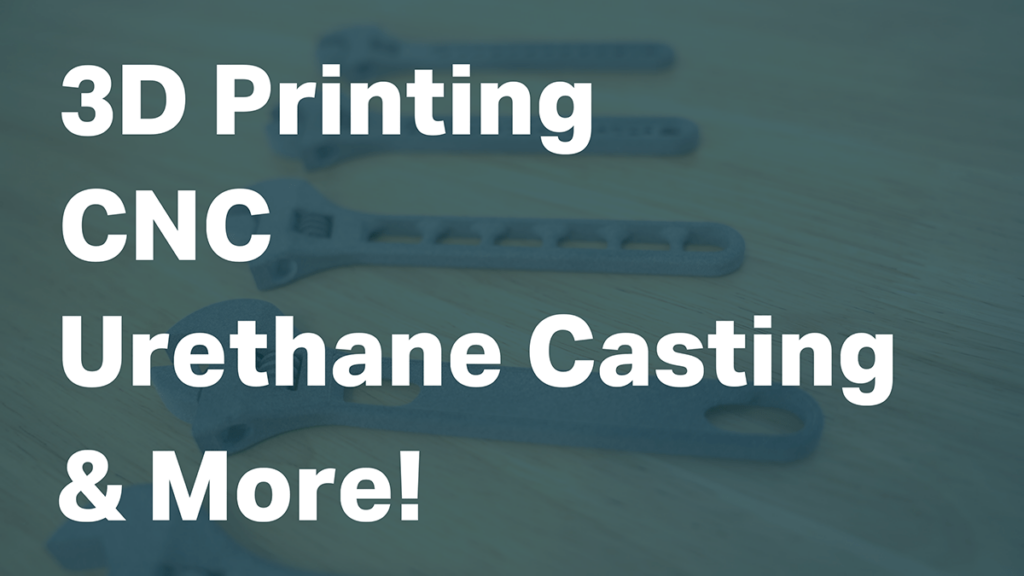
Xometry provides custom, quick-turn production services for rapid prototyping and production parts. They offer services covering commercial-level 3D printing, CNC machining, Injection Molding, Urethane Casting, and so much more. Xometry also offers 100s of material and finish options, with no quantity minimums.
Learn more about all of Xometry’s services.
In addition to instant quotes, they provide a free Fusion 360 add-in that offers design for manufacturing feedback allowing you to make design improvements before submitting for manufacturing.
Xometry Discount Code
Get $50 OFF your first Xometry order with PDO’s custom referral link.
*This promotion applies to new customers only and on orders totaling $100 or more.
Get Instant Quotes with the Xometry Fusion 360 Add-in
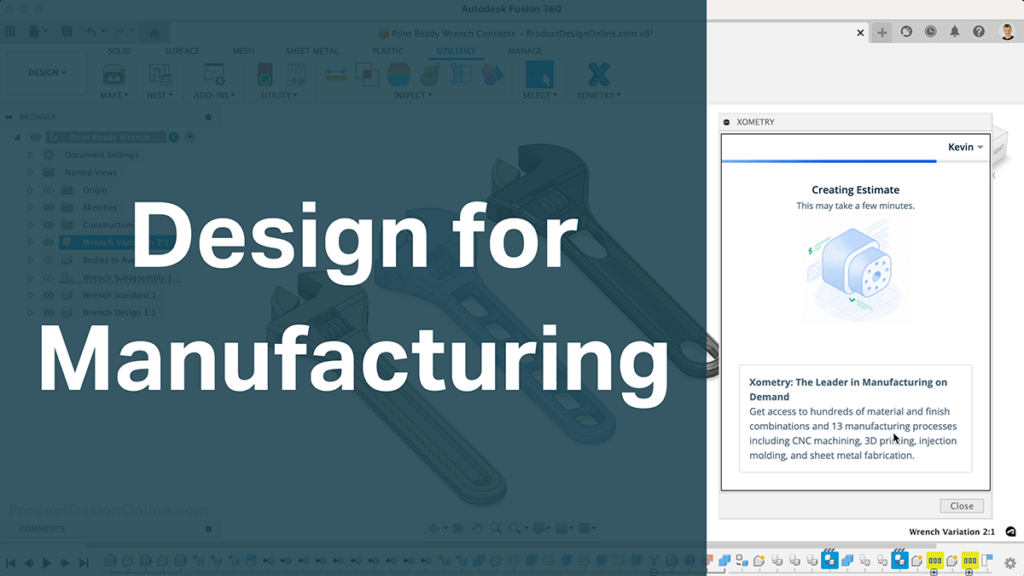
In addition to instant quotes, use the Xometry Fusion 360 add-in to receive DFM (Design for Manufacturing) feedback on your Fusion 360 files. Feedback is provided (for free) in less than a few minutes and checks criteria unique to the selected manufacturing process.
1. Download and Install the Xometry Fusion 360 Add-in
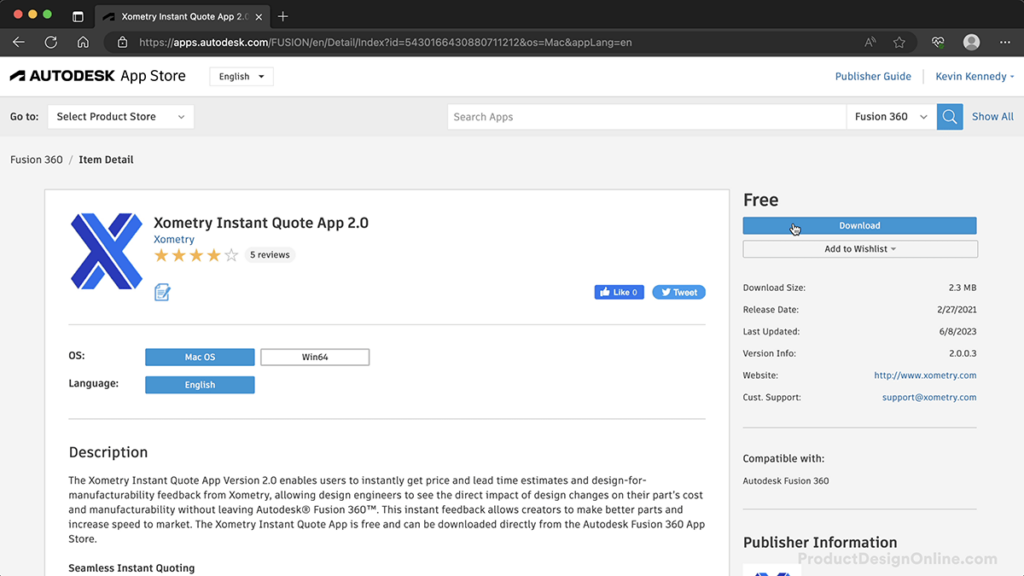
Get started by downloading the official Xometry Fusion 360 add-in from the Autodesk app store.
Important: Be sure to select your OS – Mac OS or Win64 – before selecting the Download button. Then, follow the standard installation process for your chosen OS.
2. Activate the Xometry Add-in in Autodesk Fusion 360
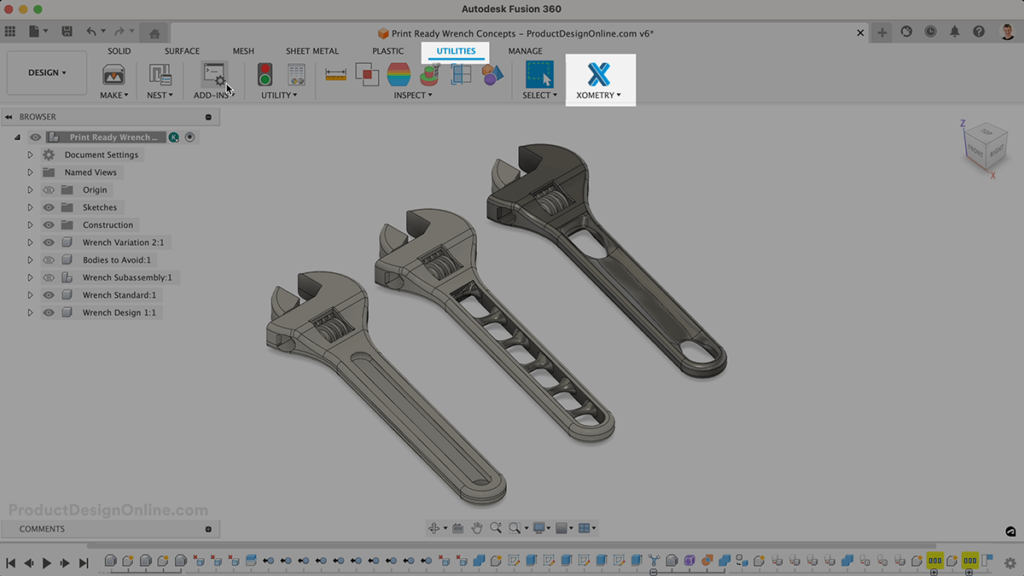
Once installed, you’ll find the Xometry add-in located in Fusion 360’s Utilities tab.
If you don’t see it here, open your Scripts and Add-ins tool (found in the Utilities tab) > select the Add-ins tab. Double-check that the add-in is running. If by chance you don’t see it listed in your Add-ins, make sure the installation process was fully completed. Then, restart your Fusion 360 application and check again.
Sign in with your existing Xometry account, or create a new one within the Fusion 360 dialog.
3. Select the Desired Components
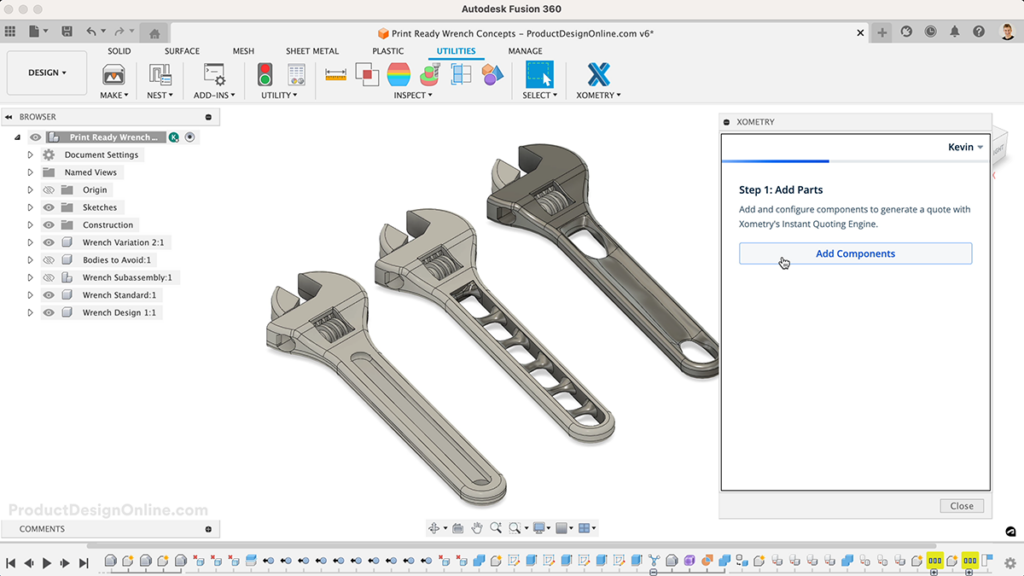
Select Add Components > Select the desired component in the Fusion 360 Browser.
Repeat this step for all remaining parts.
Important: You can add or remove parts at any time throughout the quoting process. Refine the number of parts to fit your project’s requirements and budget.
4. Define the Process, Material, and Finish
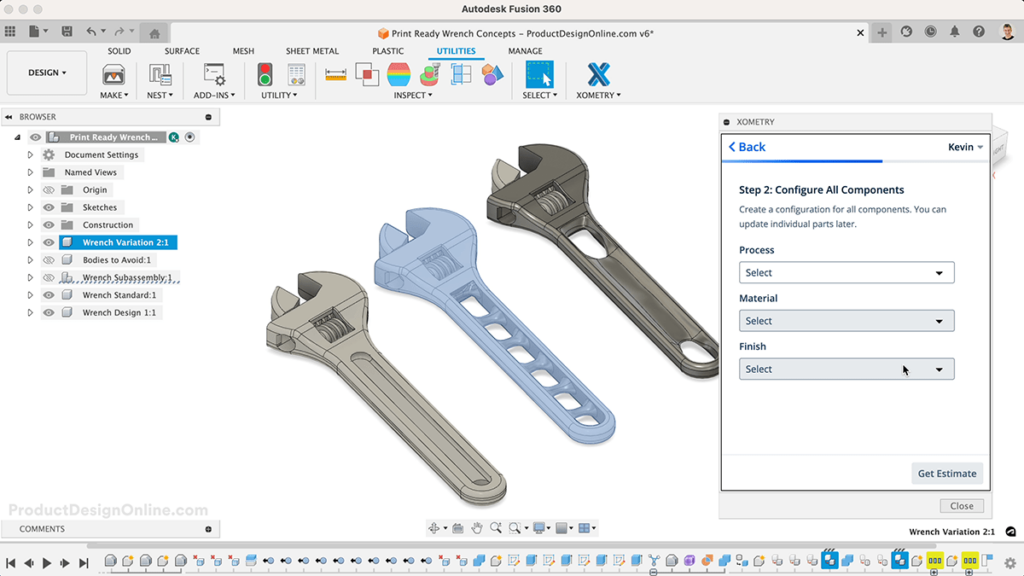
Define your desired Process, Material, and Finish.
To start, this will apply to all previously selected components. However, you can update individual parts later, including defining the process, material, and finish on an individual level.
Select Get Estimate to view your first quote.
5. Review the Estimate and DFM Feedback
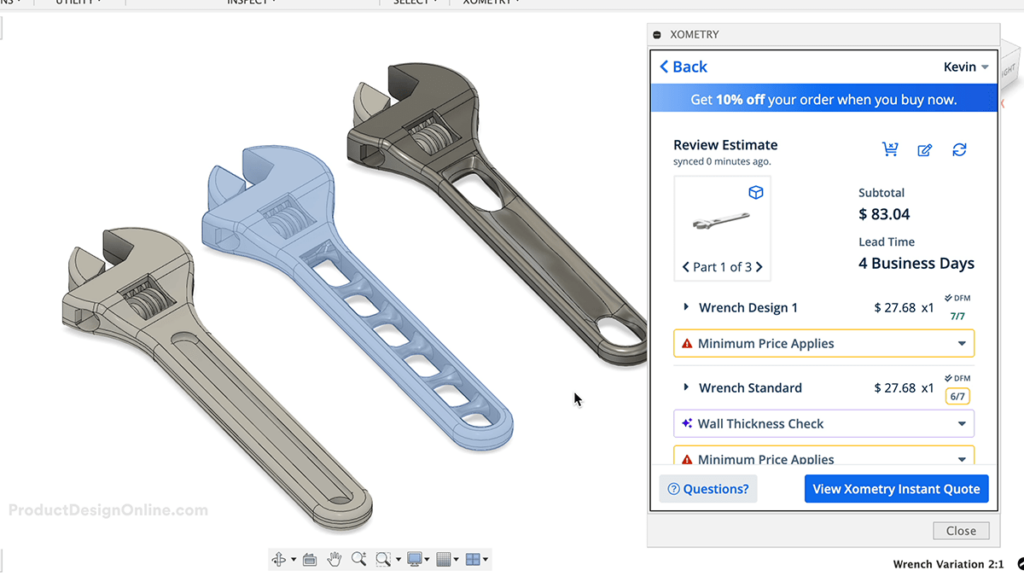
After selecting Get Estimate (previous step), your Subtotal and Lead Time will appear.
You will also receive DFM checks for each selected part. Notice the ‘Wall Thickness Check’ that appears for the ‘Wrench Standard’ part. DFM checks can help you improve your design before submitting it for manufacturing.
Important: A notice about ‘Minimum Price Applies‘ will tell you when your design doesn’t meet the minimum pricing for the selected process and material. Often, updating the quantity will result in no price change.
6. Change Process and Materials to Compare Estimates
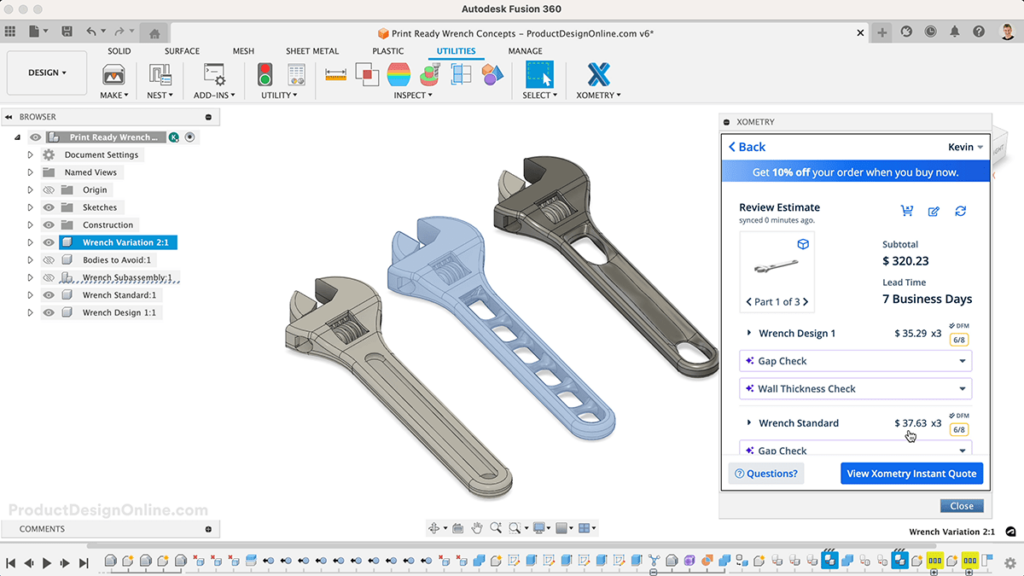
Choosing the right process, material, and finish is often dependent on the timeline and budget of your project.
Select ‘Configure All Parts‘ (second icon at the top-right) to define a new process, material, and finish for all selected components.
Otherwise, you can redefine the process, material, or finish for individual parts by selecting their respective dropdown > choose the desired options.
Any changes will require you to select Get Estimate (when all components are configured) or Save and Recalculate (when individual items are changed) to reinitiate the estimate.
7. View Xometry Instant Quote and Order Parts
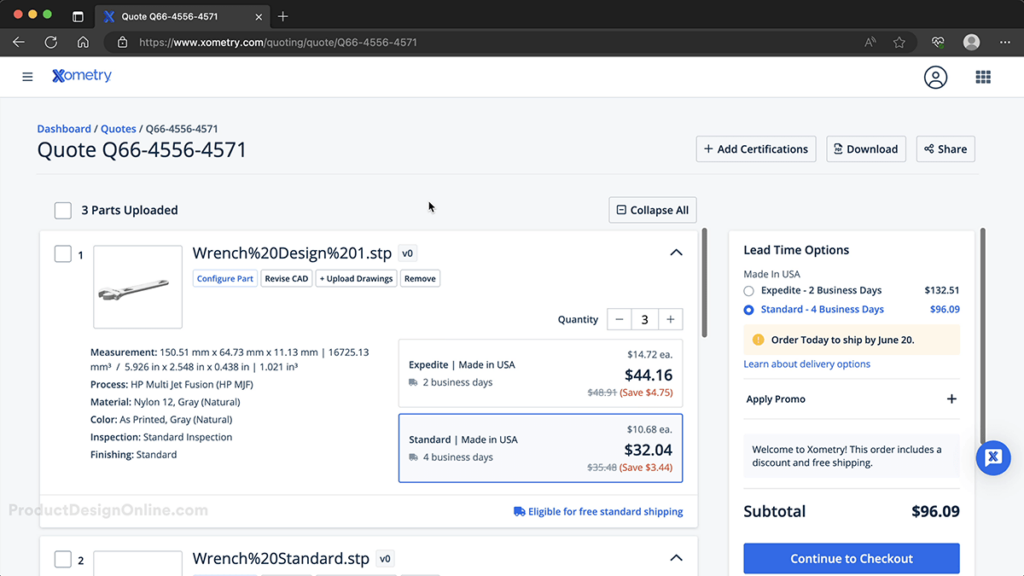
After selecting View Xometry Instant Quote in the Fusion 360 add-in, a web page will automatically load with the final quote.
Make any final changes and Continue to Checkout or Forward to Purchaser to provide a unique link to someone else in your company.
In just a few days, you’ll receive your custom parts, based on the chosen lead time.
Video Transcript
Today, we’ll look at ordering parts directly from your Fusion 360 designs. With Xometry’s Fusion 360 add-in, you can receive instant quotes and order parts created by 3D Printing, CNC machines, Urethane casting, and other manufacturing methods. They offer 100s of material and finish options, with no quantity minimums. Best of all, the add-in provides design for manufacturing feedback allowing you to make design improvements before submitting for manufacturing.
Get started by downloading the official Xometry add-in from the Autodesk app store.
Install the download package on your chosen operating system, following the standard installation process.
Once installed, head to Fusion 360’s Utilities tab where you’ll find the Xometry add-in located in the toolbar.
If the add-in doesn’t appear in the toolbar, head to the Scripts and Add-ins tool and make sure it’s running. If for some reason you don’t see it here, check that the installation is completed and restart your Fusion 360 application and check again.
Upon activating the add-in, you’ll be prompted to sign in with your Xometry account. You can also create a new account without having to open your web browser.
To get accurate pricing and lead times, make sure you’re market is set correctly. The Xometry Fusion 360 add-in now supports EU customers, including those in English, German, French, and Italian.
Select the “Add Components” button, then select the desired component in the Fusion 360 Browser.
I’ll repeat this process for the remaining two wrench designs.
Before we select ‘Next Step’ we can update the quantity. I’ll leave these all set to one, as we can always update the quantity later.
We can then configure the manufacturing process, material, and finish for all components. Note that we can also update this later, including changing the process, material, or finish on an individual basis.
I went with the HP Multi Jet Fusion, Nylon 12 gray for the material, and a standard finish.
Selecting “Get Estimate” will initiate the quoting process. This may take a minute or so depending on how many parts you selected. Keep in mind this is also checking for DFM – or “design-for-manufacturability”.
After a minute or so, our estimate loads and we’re ready to review.
We’re provided with the subtotal and lead time, as well as a 3D view of each model.
Start by viewing the 3D model to ensure everything is included.
Notice that Wrench Design 1 passed all of the DFM checks, including gap, small part, wall thickness, and so on.
However, I did receive a warning about minimum pricing for this setup, including a recommendation to increase the quantity which may result in the same price.
I’ll toggle this part open and update the quantity with two.
Selecting ‘Save and recalculate’ will load a new estimate with the updated quantity.
It looks like I’m still at the minimum, so I’ll update this to a quantity of 3. The minimum pricing notice went away, so it looks like we can get 3 of these for approximately $3 more than the cost of 2 – or we could choose to order 2 of them with no extra cost.
On the Standard Wrench component, it appears that I’m getting a DFM warning.
We can toggle to the second photo and view the model. Notice the warning area is highlighted with yellow and I’m given a warning that the wall thickness may be too small.
Keep in mind, some DFM warnings may still be okay to send to manufacturing. This does not mean it will prevent us from ordering this part.
If you do happen to make changes to your designs, based on the DFM recommendations or any other changes in requirements, you can always use the Sync button to pull in the latest design.
Keep in mind you can also close the add-in and re-open it at any time, and it will keep your estimate information active. This can be helpful when needing to make design changes.
We have the same minimum price warning for the other 2 wrenches, so we may want to update their quantities as well. However, this is never required.
Keep in mind the subtotal and lead time will update with each change, making it easy to adapt to any project requirements or budgets.
I’d like to check how much this would be with an SLS 3D printer instead of Multijet Fusion.
I’ll select ‘Configure all parts’ at the top and select SLS. I’ll also choose Nylon 12 with a smooth finish.
We can then reinitiate the estimate.
This price happens to be higher, so I’ll switch this back to MJF as that’s sufficient for printing these concept designs.
If needed, we can also reset the entire quote.
For a limited time, customers using the Fusion 360 add-in will also receive 10% off the entire order.
Once you’re happy with your chosen parts and materials, select “View Xometry Instant Quote”.
This will automatically load a web browser page where you can make any final changes and complete the checkout process – or share a direct link with someone in your company.
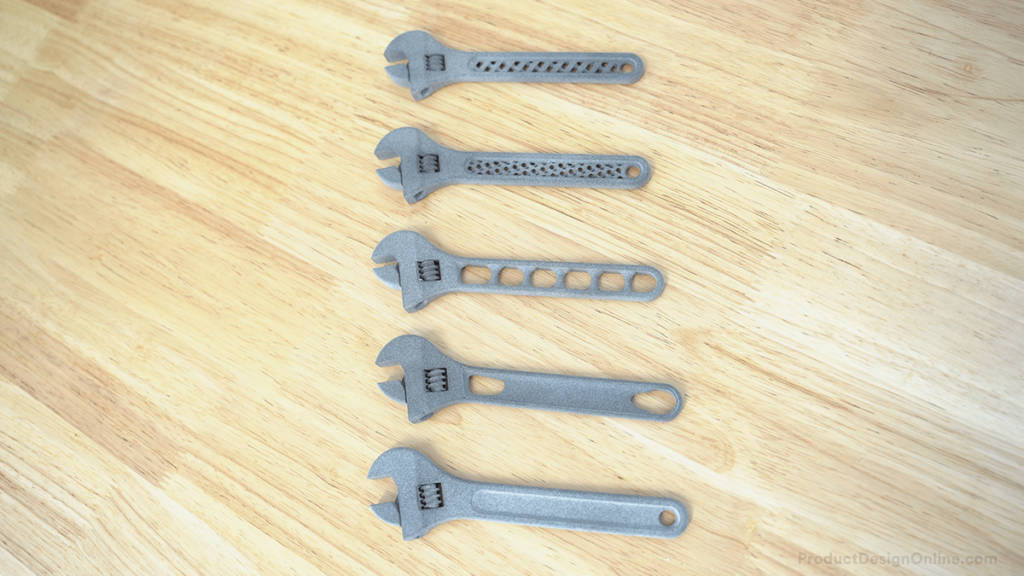
In just 4 business days, the sample parts arrived. After unpacking, all of them turned out to be in great condition and working order.
Notice the resolution that is achievable with Multi Jet Fusion 3D Printer that is not feasible on an FFF printer at home.
It’s now easier and more affordable than ever to order commercial quality parts for prototyping or production – right from your Fusion 360 designs.
[Upbeat Music]
Be sure to check out the other lesson where I discuss how these wrenches were created using Automated Modeling in Fusion 360.
[End Upbeat Music]
Leave a Reply