Fusion 360 is a top-down modeling program, which means parts can be designed and built within the same file.
Assemblies can contain up to 1000 bodies and components. Ultimately, the number allowed depends on how complex each one is – along with your computer specs.
So what happens when you want to focus on a specific area of a model?
Active Component Visibility
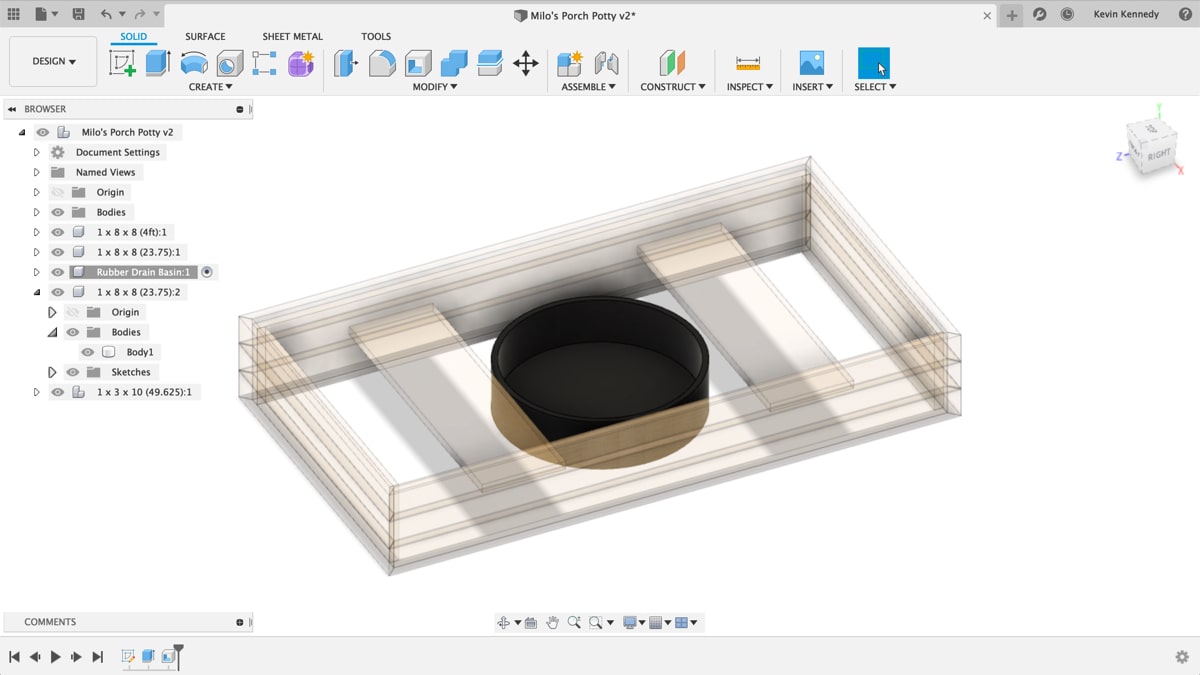
By default, Fusion 360 will “ghost” all non-active components.
Take a look at the “1 x 8 x 8 (23.75)” component in the image below. The component looks opaque because it’s “active.” The remainder of the components automatically become translucent, letting you focus on the active one.
In some scenarios, you may want to disable this feature so you can look at the entire model.
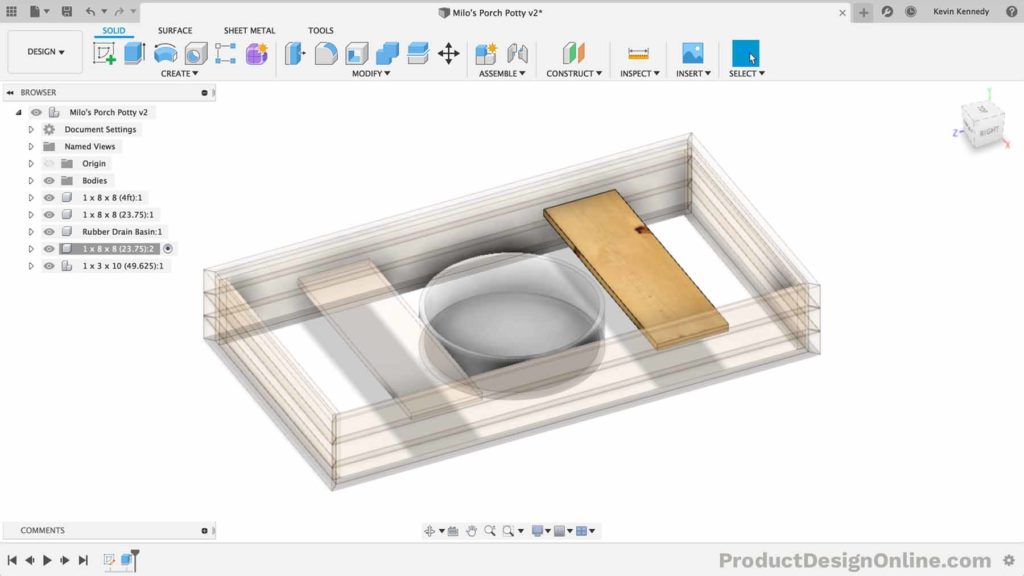
Disable Component Transparency for Non-Active Components
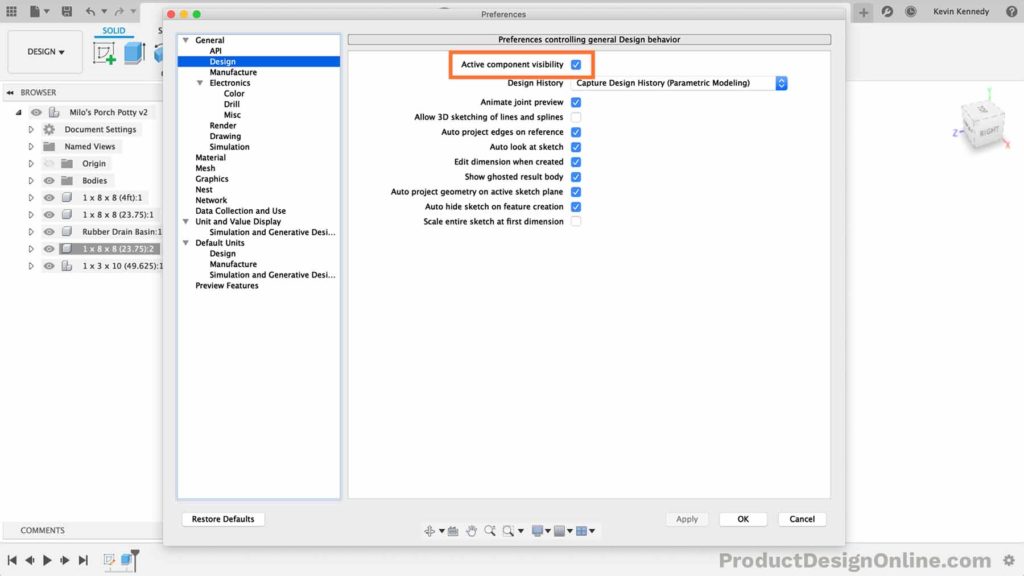
- Select your username in the upper right-hand corner
- Select Preferences
- Select the Design tab on the left
- Uncheck the “Active component visibility” option
- Commit the changes by selecting Apply > OK
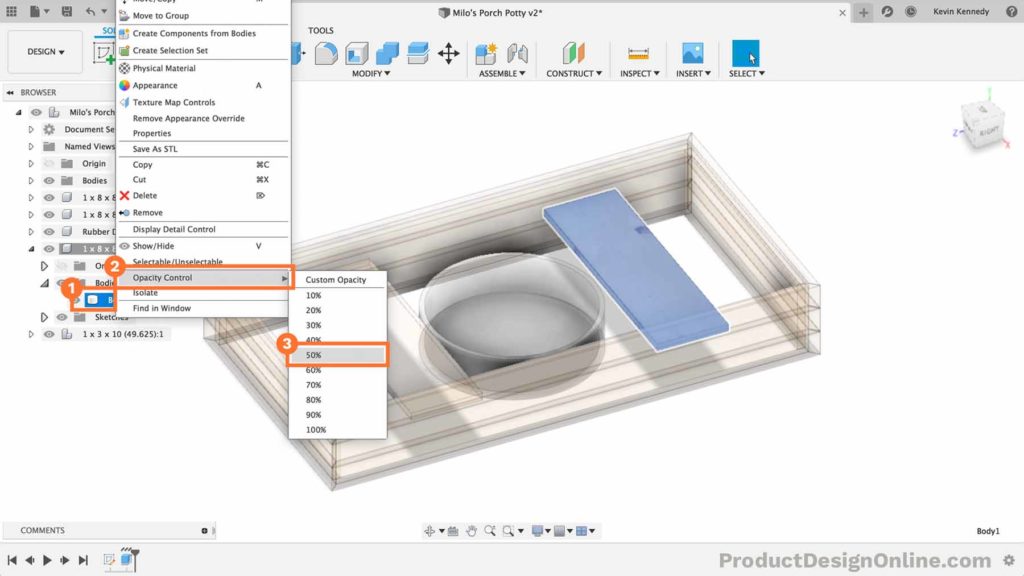
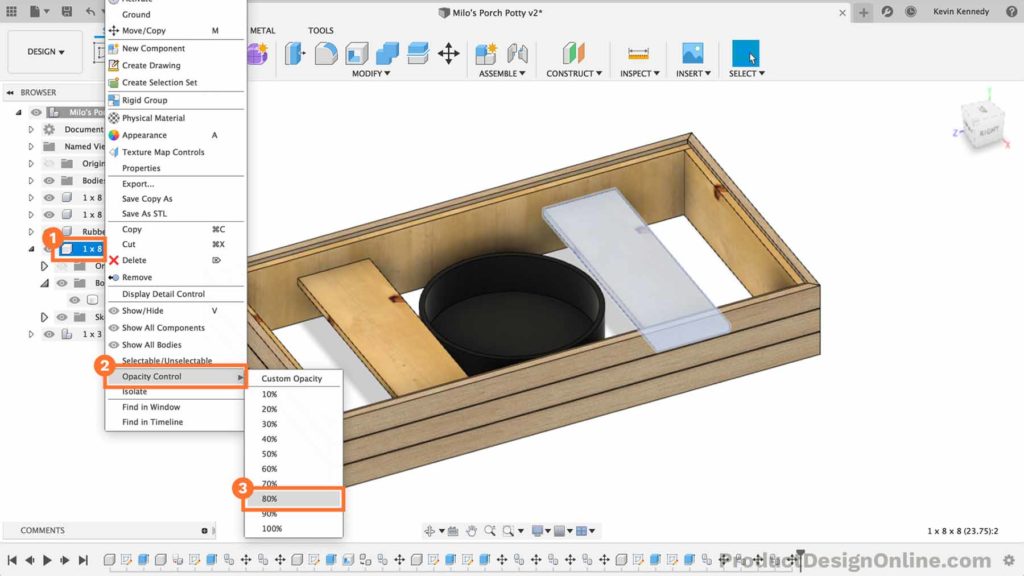
Adjust the Opacity of a Body in Fusion 360
You may find it helpful to lower the opacity of a specific body in your assembly file. Lower opacity is helpful when you have several bodies grouped in the same component.
- Right-click on the body in the Fusion 360 Browser
- Find the Opacity Control flyout folder
- Select the desired opacity
Note: Custom Opacity lets you define a unique opacity between 0% and 100%. Zero percent will still be visible because of the shaded appearance. Select the corresponding eyeball icon in the Browser to hide the body completely.
Adjust the Opacity of a Component in Fusion 360
Similar to bodies, you may find it helpful to lower the opacity of Fusion 360 components.
Adjusting the opacity of components can make it easier to work on components in complex assembly files.
- Right-click on the component in the Fusion 360 Browser
- Find the Opacity Control flyout folder
- Select the desired opacity
Note: Custom Opacity lets you define a unique opacity between 0% and 100%. Zero percent will still be visible because of the shaded appearance. Select the corresponding eyeball icon in the Browser to hide the component completely.
Hi Kevin,
I found fusion360 can’t isolate one body when there are few bodys in the component , Is there any quick way about this?
Hi Joe,
There are a few things that you can do to make it easier to work with nested bodies. First, you may find it helpful to shift-click all the unwanted bodies in the Browser (that are nested in that component) > select the option “Selectable/Unselectable” which will “freeze” the bodies so they can’t be selected. In the Browser, a small red “no” icon will appear on the unselectable bodies.
Second, you may also find it helpful to lower the opacity of the unselectable bodies. Sometimes I find it easier to simply drag and drop a glass appearance onto them, making them transparent. This is essentially the workaround to isolating bodies as Fusion 360 truly only isolates components in assembly files.
Cheers,
Kevin
Is there any way to change the opacity of a linked component without breaking the links? It seems counter intuitive that if you have two of the same linked component in an assembly that you can’t control the opacity of each individual component separately, but from what I’ve seen this far, that is the way it is in Fusion. Is this correct, or is there another way to do it other than changing the opacity of all linked instances of the same component?
Hi Corey – You’re exactly right—Fusion 360 does not allow you to change the opacity of individual instances of the same linked component without affecting all instances globally. This is because linked components (from external references) are treated as single-source representations, and appearance-related properties like opacity are inherited from the source file.