Looking to insert an SVG into your Fusion 360 file?
In this quick step by step tutorial, I’ll show you how to quickly insert an SVG. Having an SVG can save(keyboard shortcut CMD/CTRL+S) Saves the file that is currently open. More a tremendous amount of time if you are looking to create a Logo, text, or another complex design that you already have an SVG file of.
1. Insert (in Fusion’s Model mode)
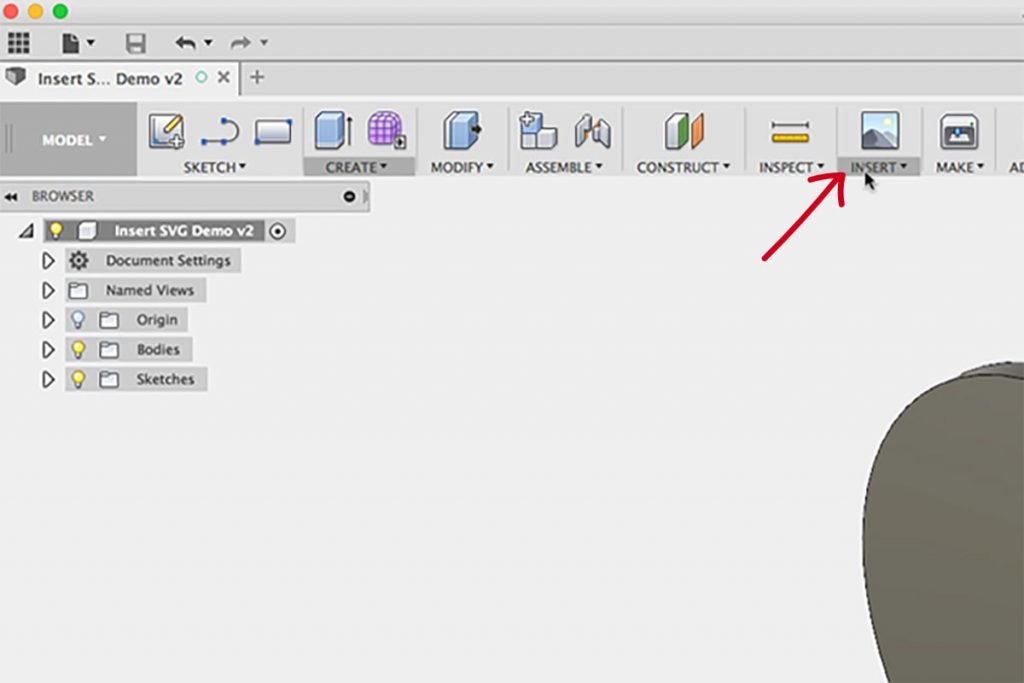
First off, you’ll need to make sure you are in Fusion 360’s “model” mode. At this time, inserting an SVG is not available in any of the other environments.
2. Click Insert SVG
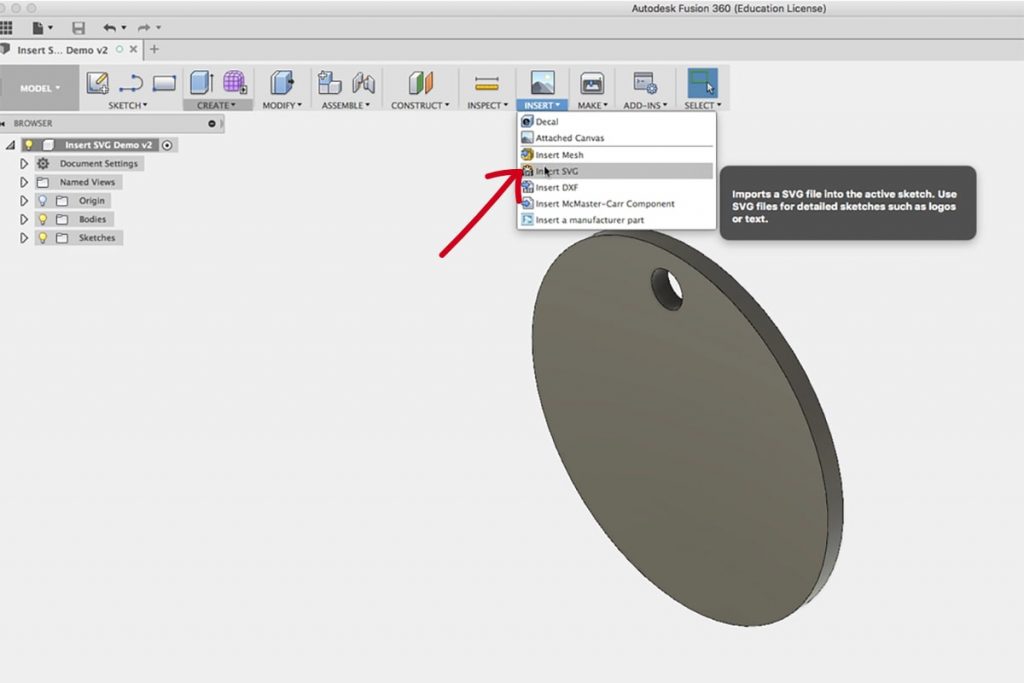
Under the “Insert” drop-down you will need to selectThe selection mode controls how objects are select when you drag in the canvas. More “Insert SVGImports an SVG file into the active sketch. Use SVG files for detailed sketches such as logos or text. More.” (There are no shortcuts or hotkeys for inserting an SVG).
Note: SVGs can only be imported to active sketches.
3. Select the plane
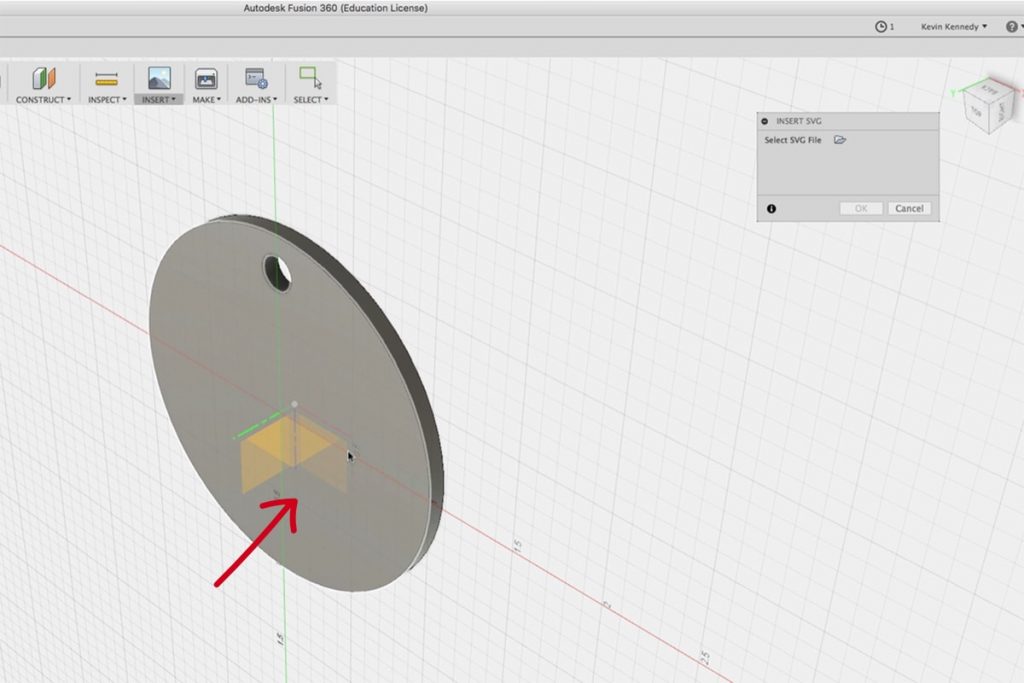
After selecting “insert SVG” you will be prompted to select the plane that you want your sketch on. Select the plane you want to insert the SVG file in the same way as if you were selecting a plane to sketch on.
4. Select the Folder Icon
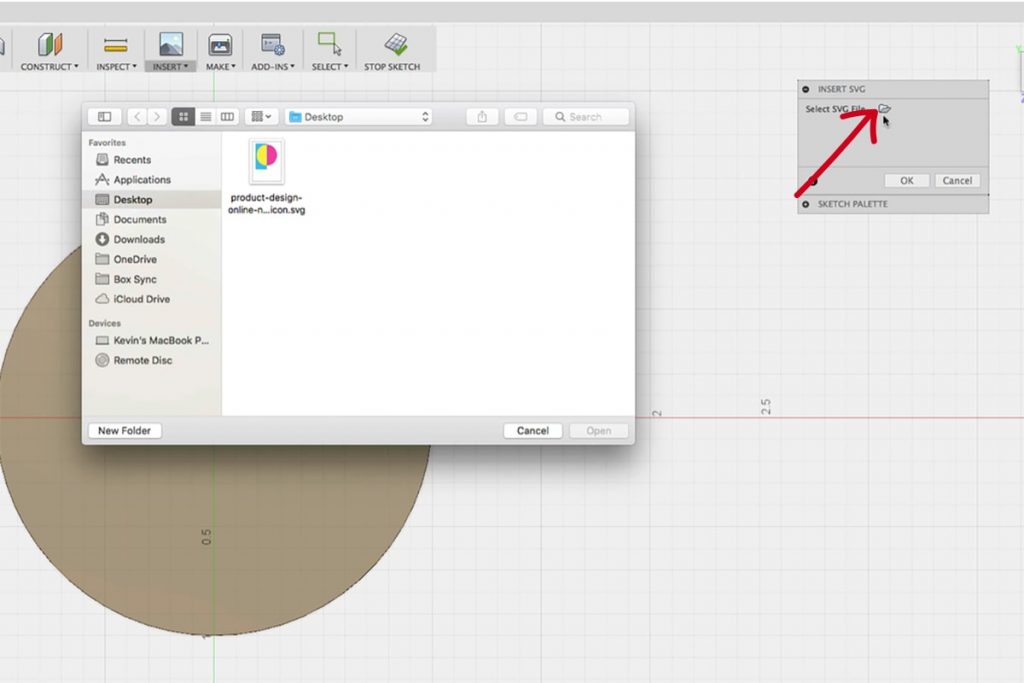
Select the folder icon, which will open up your computers dialogue boxCreates a solid box. Select a plane, draw a rectangle then specify the height of the box. More. Then, you will need to select the SVG file that you are wanting to import.
5. Move and Resize the SVG
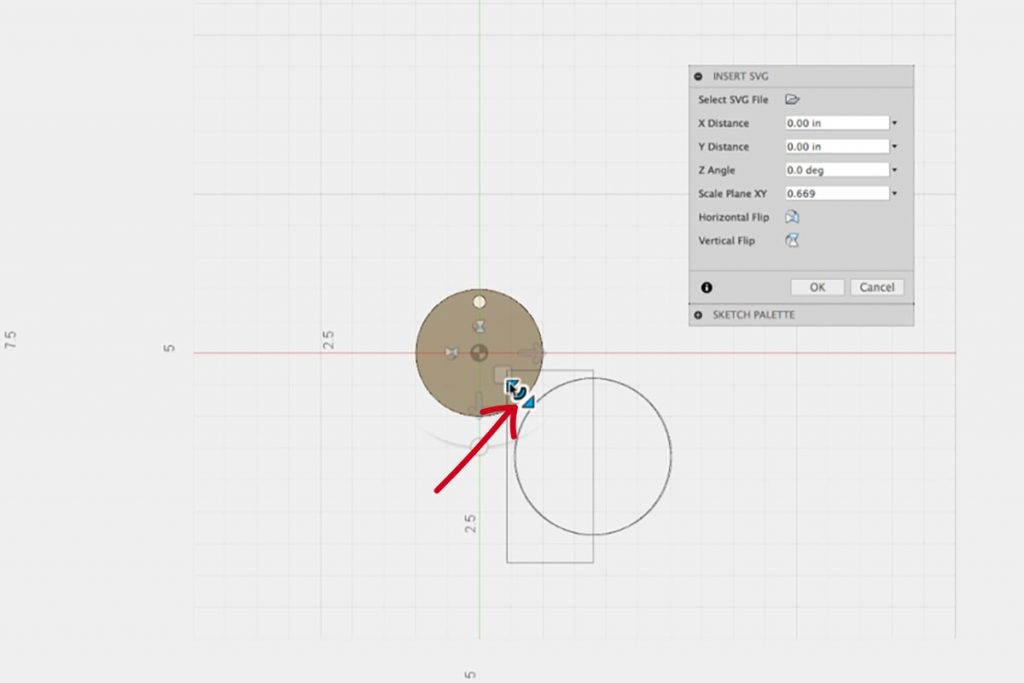
The SVG will now be placed on the sketch plane you chose. It’s unlikely that the SVG is in the right size or position. Use the manipulator handles that allow you to move and resize the SVG sketch. Alternatively, you can punch specific numbers into the “insert SVG” dialogue box.
The manipulator handles will allow you to move, rotate, and scaleScales sketch objects, bodies, or components. Select the objects to scale then specify the scale factor. More the SVG image on the active sketch plane.
6. Click “OK” to exit the SVG Dialogue Box
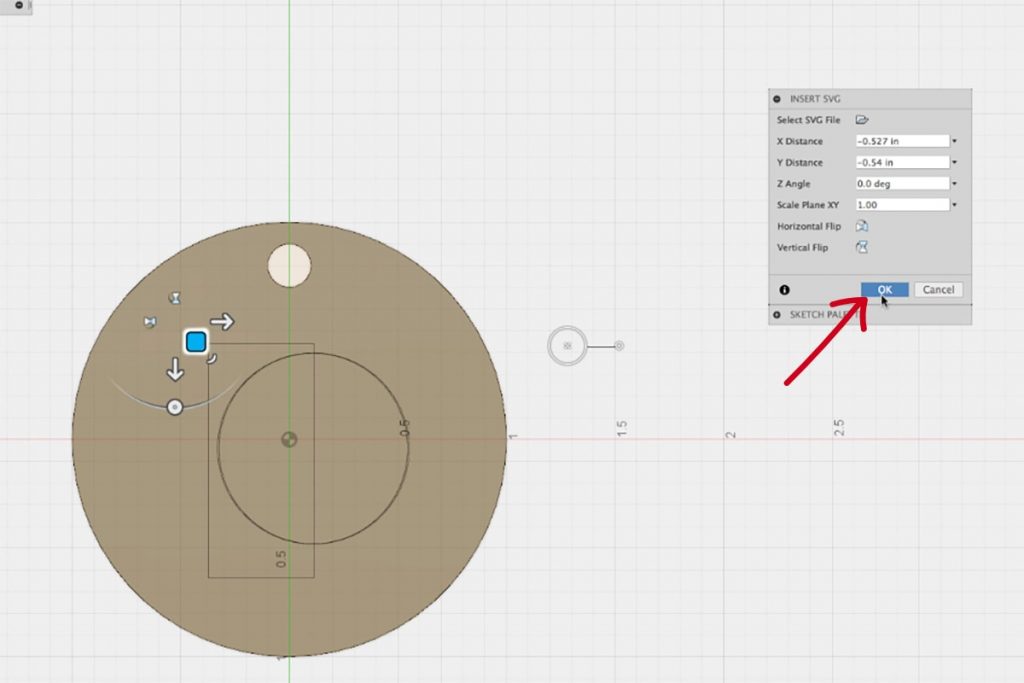
Once the SVG is in the correct position simply click “OK” in the SVG dialogue box. This finishes inserting the SVG file as an active sketch. As you can see, Fusion 360 recognizes closed contours in the same way it would with any sketch.
7. Create 3D Geometry with the SVG
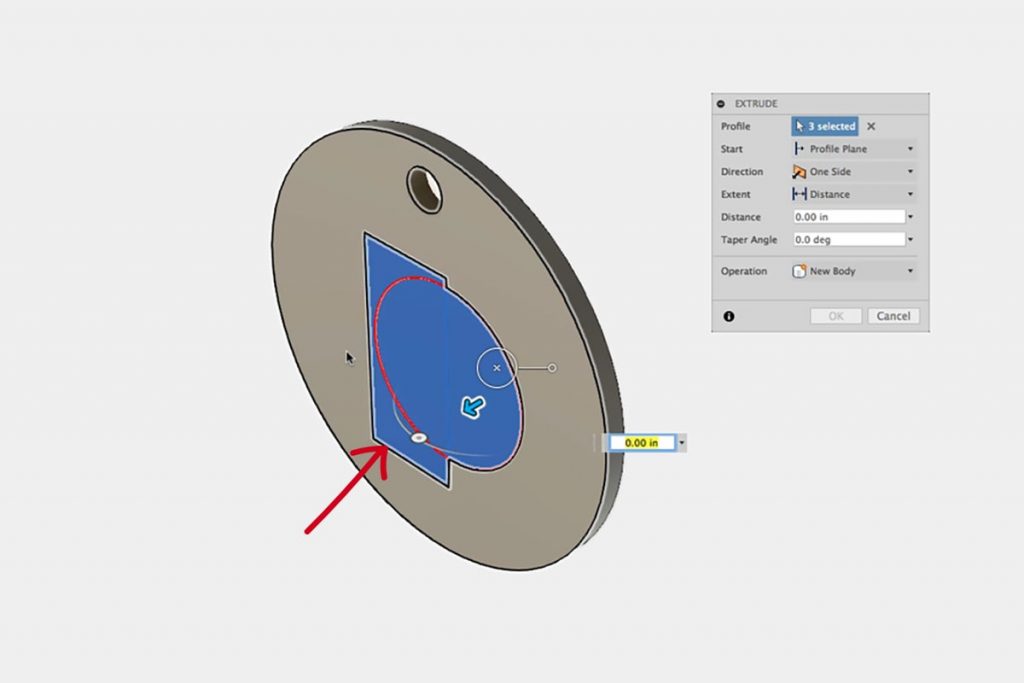
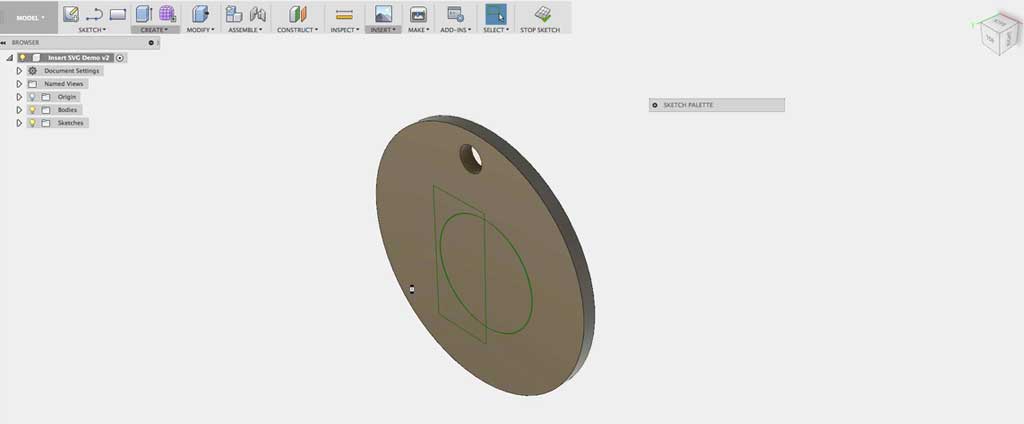
Now, you can create 3D geometry from your imported SVG file in the same way as you can with sketch geometry native to Fusion 360. This allows you to create bodies and components using any of the methods available in Fusion 360 from your imported SVG sketch. The part is now nearly ready for 3D printing or the CAM workspaceGenerates tool-path strategies for the design to be fabricated. More.
Prefer to learn by video?
Check out how to insert an SVG into Fusion 360 on my YouTube video below.
Leave a Reply