Transcript:
By the end of this video, you’ll know how to use the Conic Curve in Fusion 360.
The Conic Curve can be activated from the sketch dropdown list or from the right-click sketch menu.
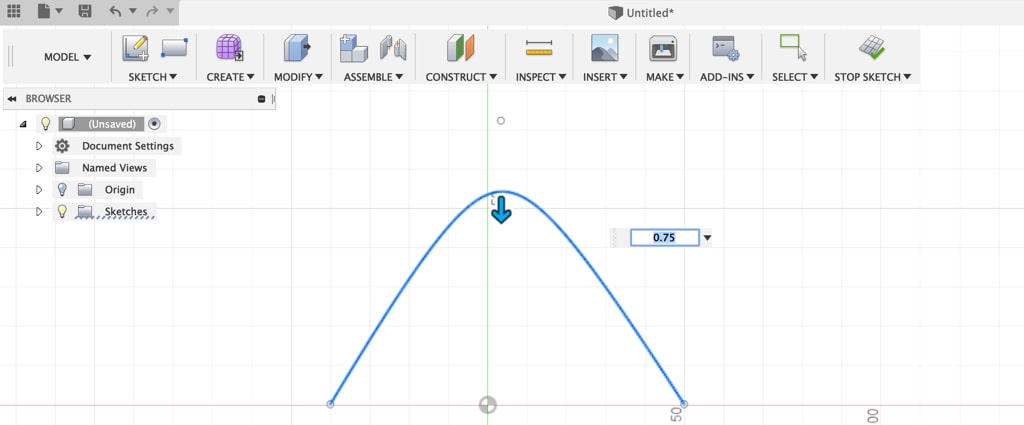
The conic curve command creates a curve driven by two endpoints, a vertex, and a Rho value.
Once the command is activated, you’ll need to selectThe selection mode controls how objects are select when you drag in the canvas. More an origin plane or any preexisting faces or sketch geometry on which you’d like to draw the curve. Then, simply click to set the first endpoint and you’ll have to click a second time to set the second endpoint.
Then, as I move my mouse cursor, you’ll notice the curve starts to form in the direction of my mouse.
At this pointCreates a sketch point. More, you’ll need to set the vertex by clicking a third time with your mouse. I’ll simply click to set the vertex.
After the vertex is set, you’ll see that you can either define the Rho value by typing it out in the input field…. Or you can adjust the Rho value by dragging the blue directional arrow.
It’s important to note that the value entered for Rho must be between 0 and .99 repeating.
Imagine the conic curve as a rounded corner, which then means Rho is the ratio of the distance of the peak of the rounded corner to the sharper corner…or in simplest terms, its distance 1 over distance 2.
If you’re not familiar with conic curves then you’ll want to familiarize yourself with the type of geometry that is created based on the Rho value. Imagine you have a cone shape in front of you. Then, you slice it with a plane. Depending on what angle you slice the cone at, you will get a circle, an ellipseCreates an ellipse defined by a center point, major axis and a point on the ellipse. Select the center point of the ellipse. Select the second point to define the first axis. Select the third point to define a point on the ellipse. More, a parabola, or a hyperbola.
If the Rho value is 0.5, then the conic is a parabola. If the Rho value is greater than 0.5, then the conic is a hyperbola. If the Rho value is less than 0.5, then the conic is an ellipse…. And to achieve a circle you would have to have the exact Rho value which depends on the angle of the corner. For example, for a 90-degree corner, Rho for a circle is the square root of two, minus one.
At this point, you might be wondering why the Conic Curve is included in the available sketch geometry, and how this could be helpful in CAD.
CAD professionals really like conic curves because they’re more interesting than arcs, while still being less cumbersome than splines. They also require a lot less math to solve than the math needed to manipulate splines.
The other benefit of the math being simpler is that the conic curves are more lightweight and easier for computers to handle as well. The nature of their combined x-squared and y-squared terms means conics have a varying curvature but do not ever change convexity as splines can. This allows us to create smooth, flowing blends, without worrying about wrinkles or dimples that can be caused by unruly splines.
Just to give you an idea of where conic curves can be used… you’ll find that conic curves are often used in transportation-related objects, especially when aerodynamics are a large consideration.
This means, if you’re looking to use Fusion 360 for building airplane models, or other types of aerodynamic bodies, then you may find the conic curve to be an essential part of your sketch geometry.
In summary, you likely won’t find yourself using the conic curve command on a daily basis. However, it does come in handy if you need a guaranteed smooth surface, that isn’t possible with the splineCreates a spline curve through the selected points. Select the first point to start the spline. Select additional points as fit points. More commands.

Very helpful. Thanks for sharing.
Glad to hear that, Andrew! Thanks for stopping by 🙂